
Terrain
Warhammer 40k Jungle Terrain: Tree Stump Bunker and Toppled Rock Spire
With a few pieces of jungle-themed terrain in the collection and working out really well in games, I decided I needed a couple of larger, line-of-sight blocking pieces to add some variety to the kinds of terrain that can be used and allow for denser terrain layouts. To make big natural looking features, I opted for carved insulation foam with my old (probably 15+ years since it's last use) how wire cutter. It's a simple setup running a piece of nichrome wire across an L shaped bow - gets a wide cut and lets you do gradual slopes on big pieces, and I power it with a benchtop variable power supply. The 14" or so piece of wire (unknown gauge, I believe it's the Woodland Scenics packed, originally) heats up to cut around 7-8V, but I ended up running at 12V to allow for cleaner cuts (faster melting means less streaks in the finish too) and it takes up a little over 100mA per volt, so a fixed 12V 1.5A supply would suffice for my custom bow and ones like it. I took pictures along the way to get a bunch of the intermediate steps, so I'll outline the way I built them up and a couple tweaks I'll probably make to the process in the future!
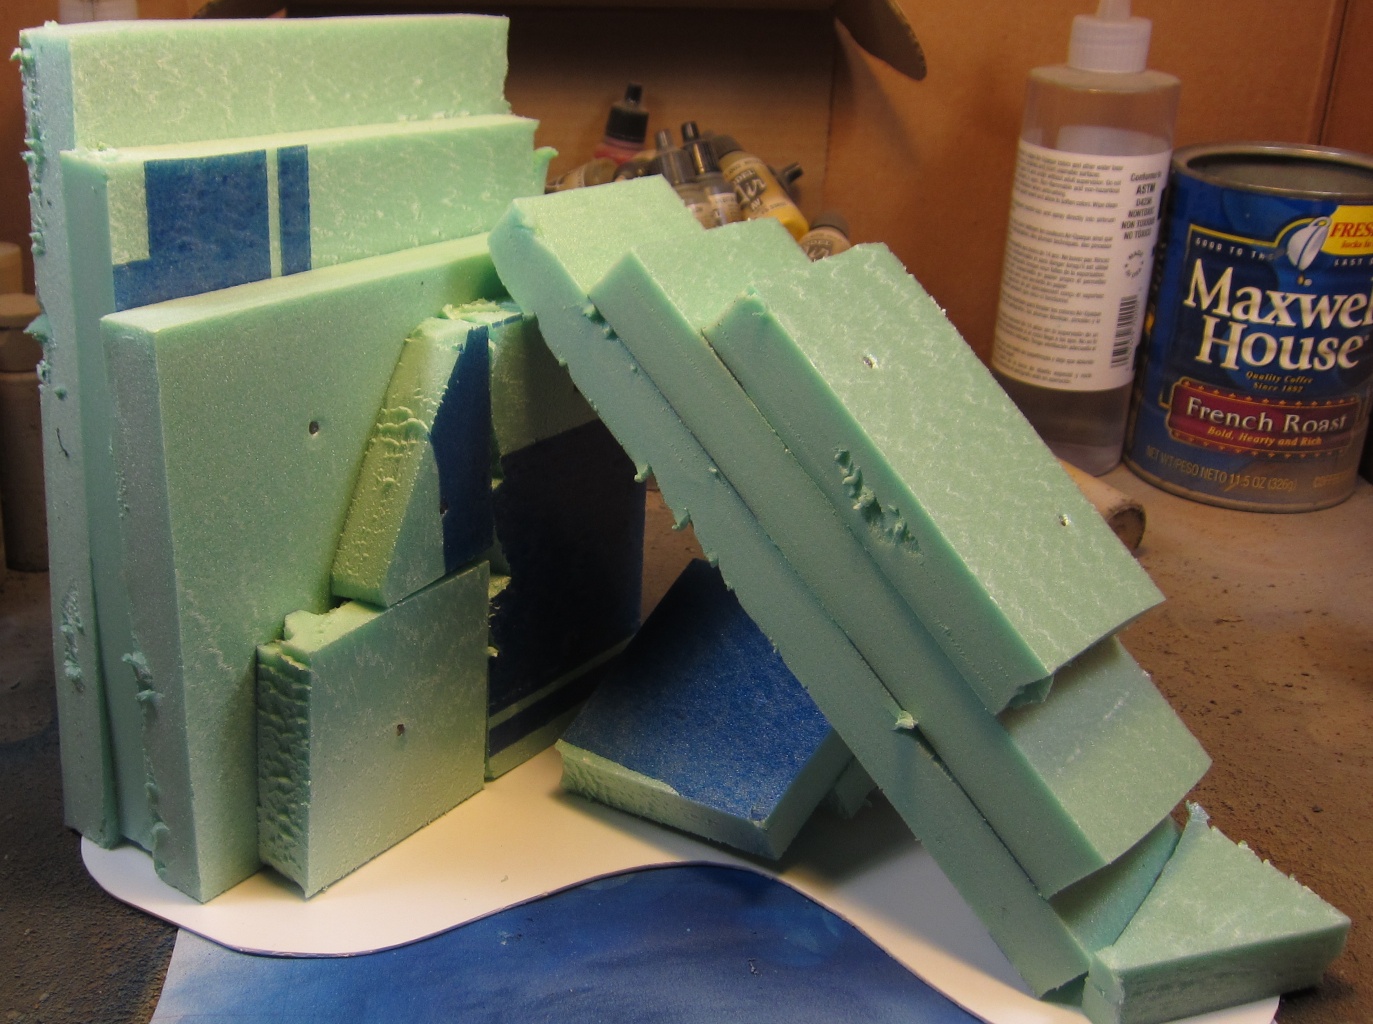
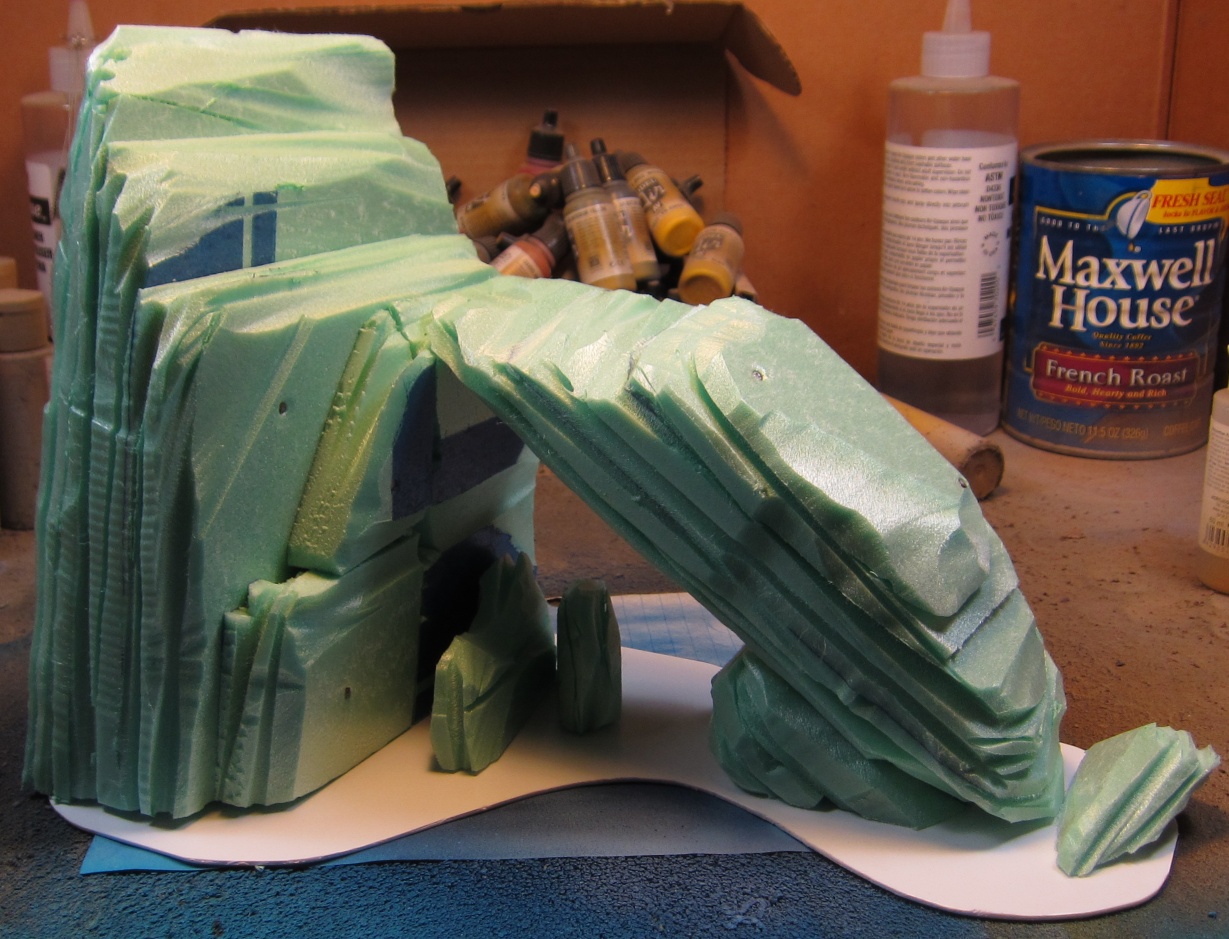

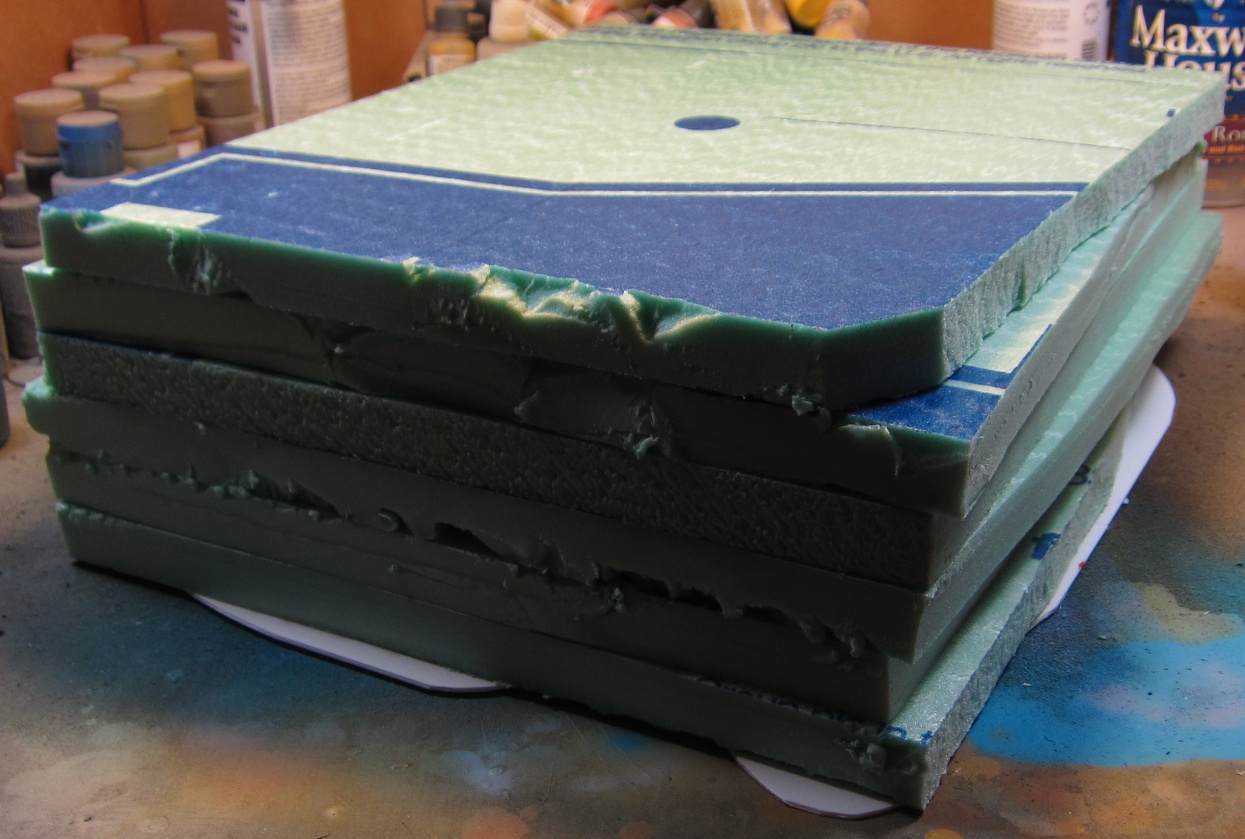
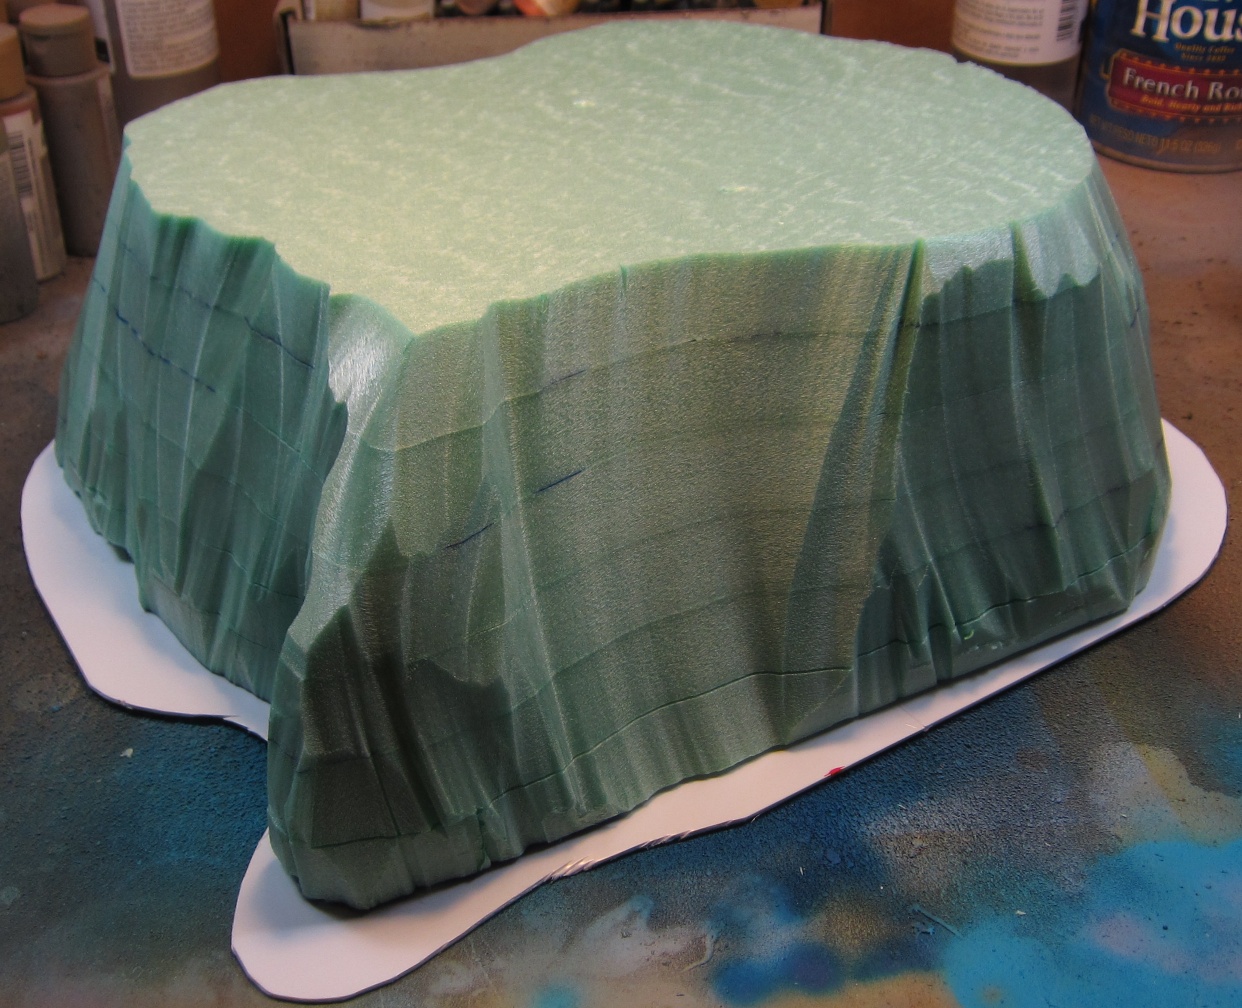
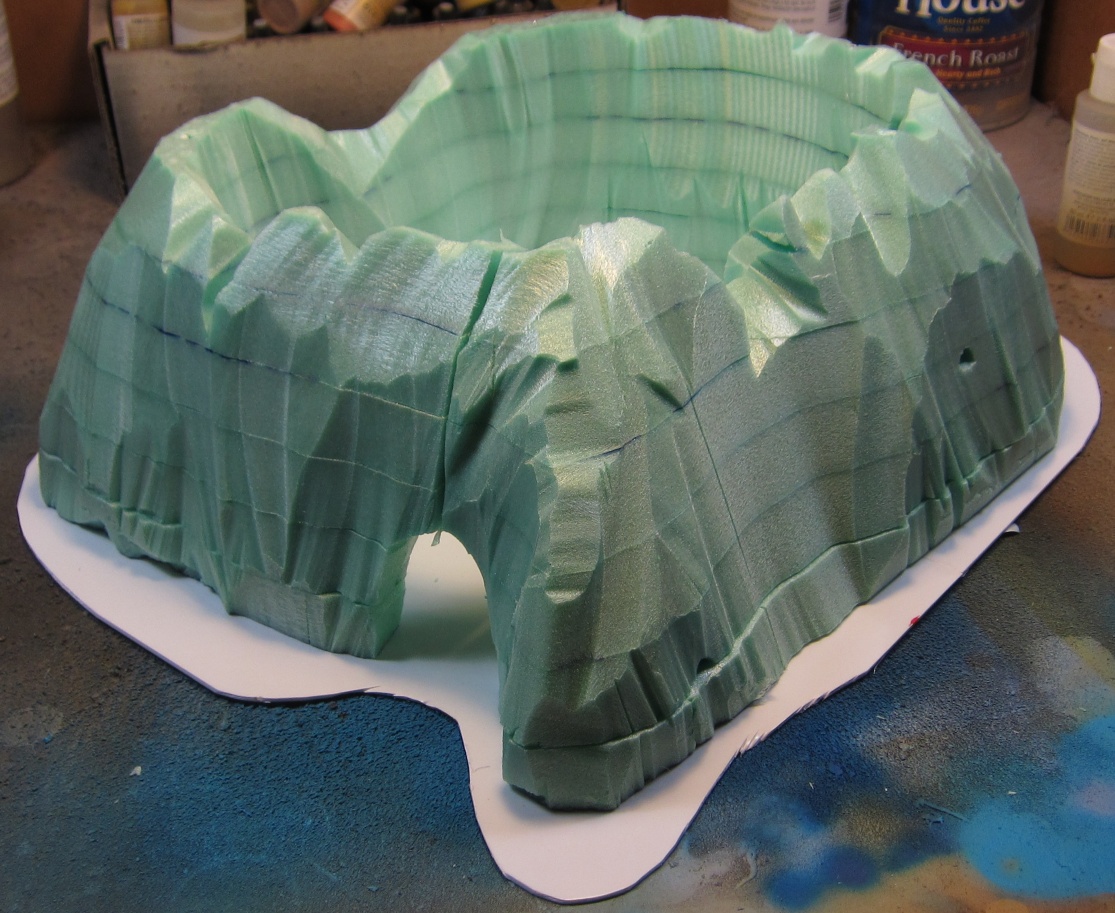
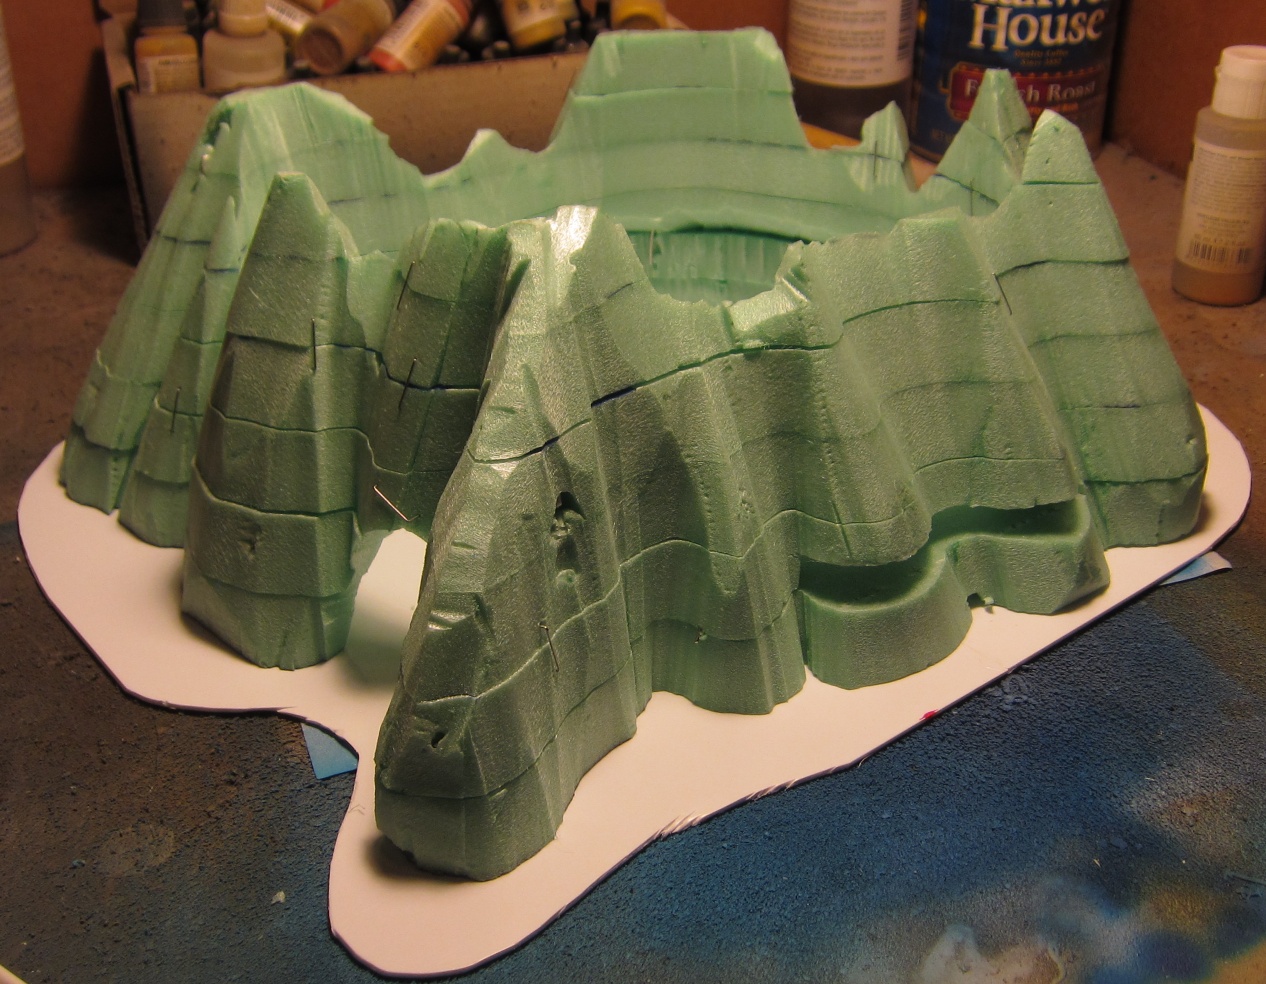
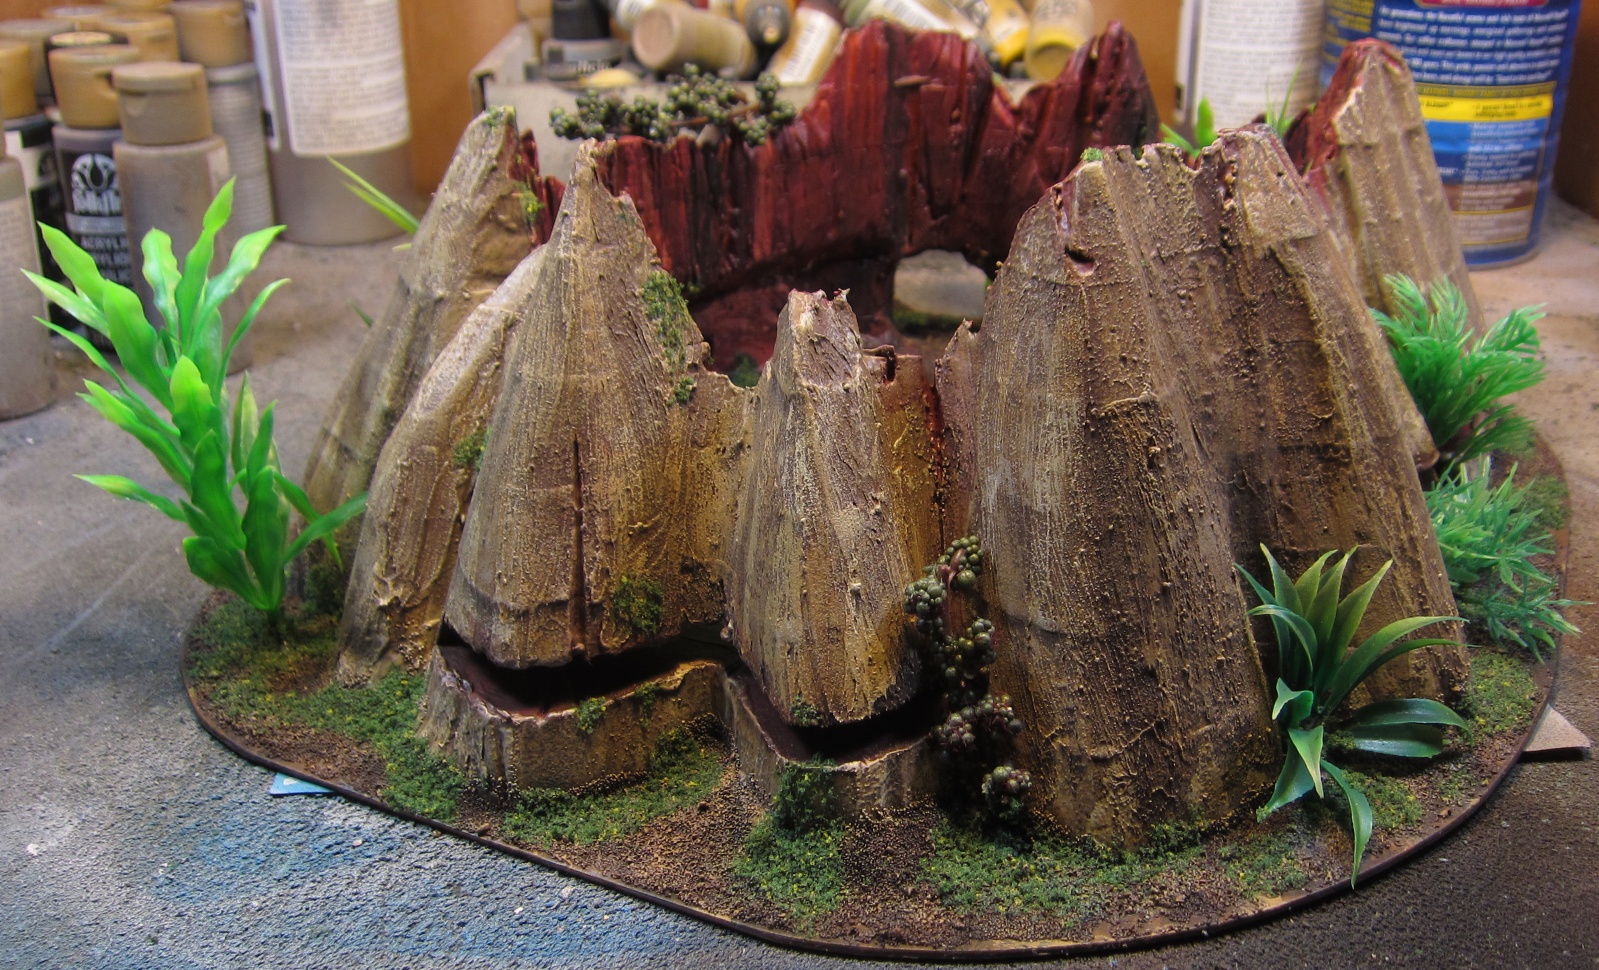
Carving for both pieces started with a stack of foam sheets stuck together with some pins (nails and plastic rods). You start carving off pieces to get a general shape, then a general texture, then you take a look and see if it fits the general look you're going for or whether it will be the size you want, etc. I decided that the second stage of the rocks needed more texturing work, but also needed to look less like the stack of sheets it was coming from, so I did some trimming in other dimensions and rounded some chunks to hide that. With the tree stump, I ended up moving the pins holding it together several times and putting it back together imperfectly ended up making ridges along the sheets which came through all the way to the end - not too bad, but not what I was hoping for. If I had planned it out better, I could have put the pins in strategic places and not moved them, or I could have found a glue that the wire cutter would handle and just glue the sheets together. The melting gives a little bit of adhesion between sheets, but the slight slipping affects the drybrushing and is especially obvious under top-down lighting. Even with a fairly thick covering and some sanding, they still show through!.
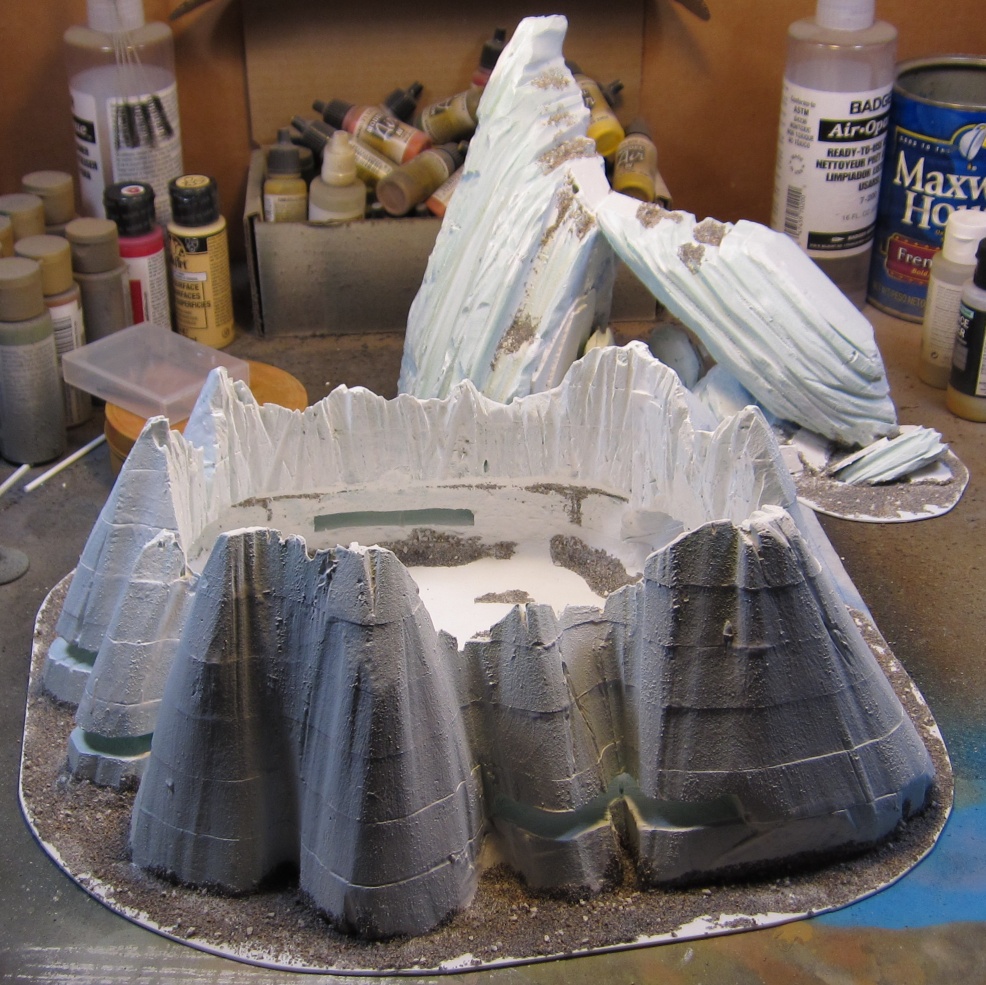
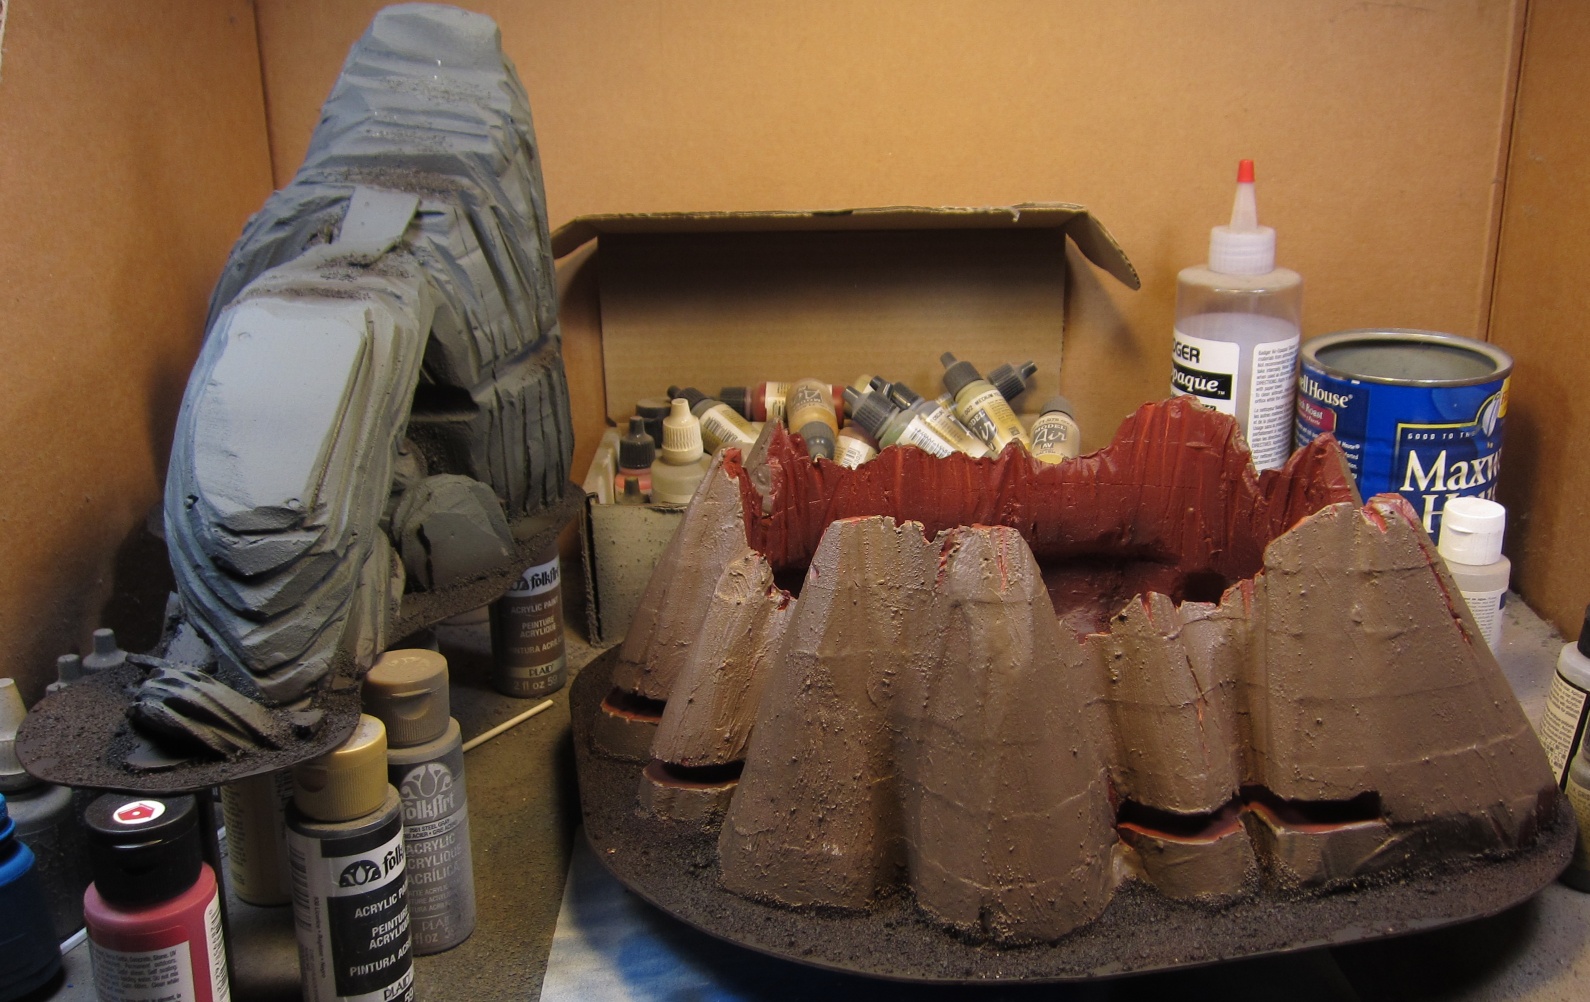

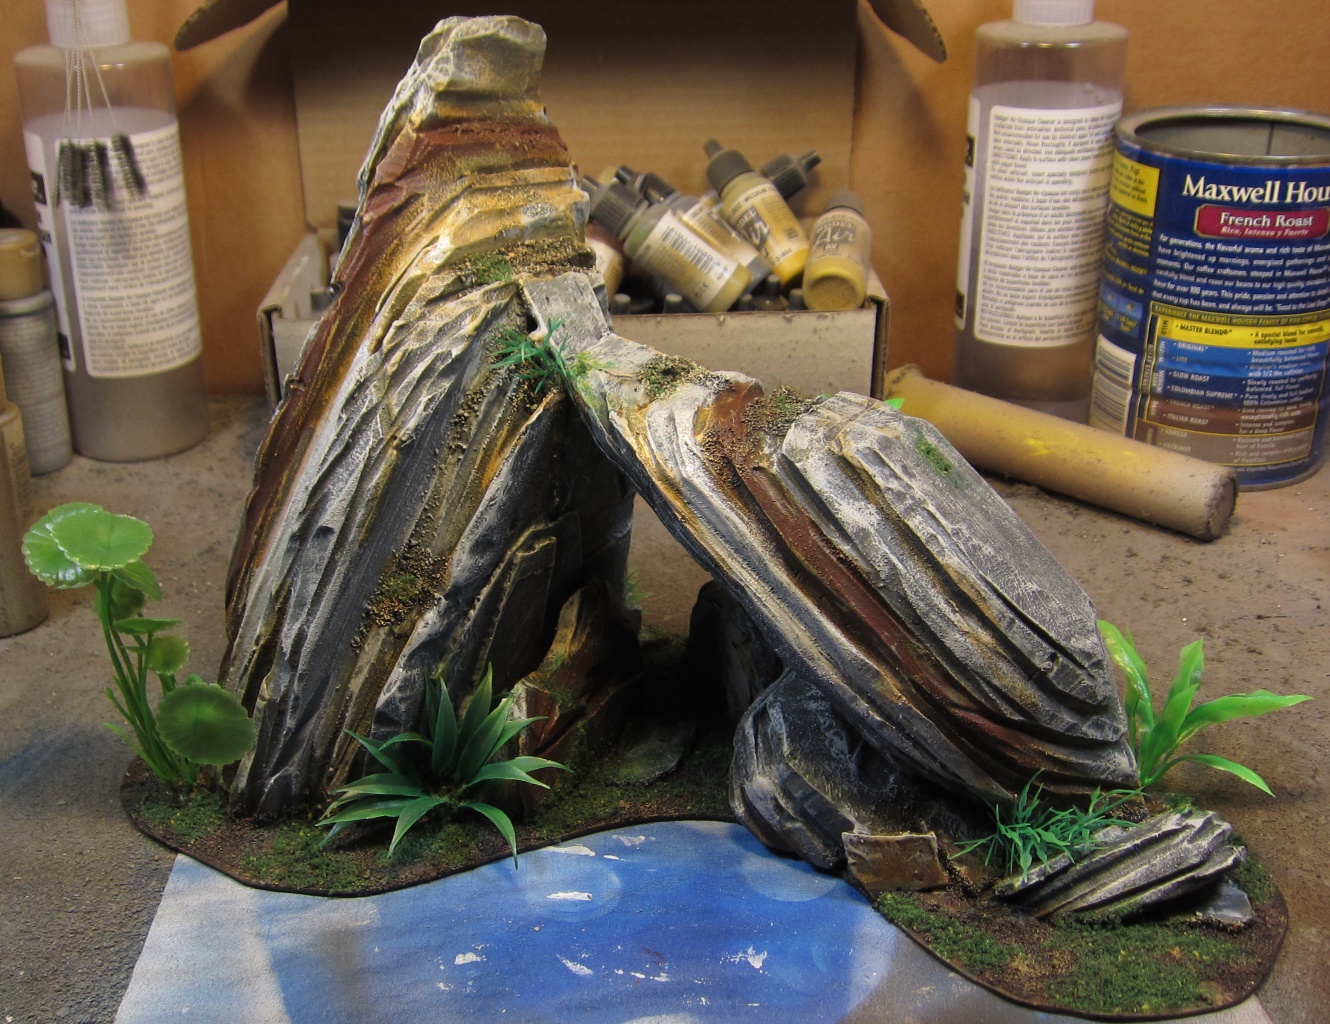
To finish off the sculpts, I cast some plaster and PVA mixture on a sheet of glass, then broke up the result to give me some flat, slate-like rock pieces to add some detail and some debris from the toppling of the spire. On the stump, I filled in some gaps and some space I wanted different with some cellulose based, minimal-shrinkage modelling clay. I then scuffed up the polystyrene sheet bases with rough sandpaper and glued on the foam using a multisurface white glue - acts a lot like PVA, but seems to adhere better. From there, I covered the foam parts in two coats of regular gesso - it's somewhat flexible so it is less likely to flake off and it adheres both to the foam and to paint well. Then I did my usual PVA + water mixture to hold down a mix of sand and modelling ballasts for a ground texture.
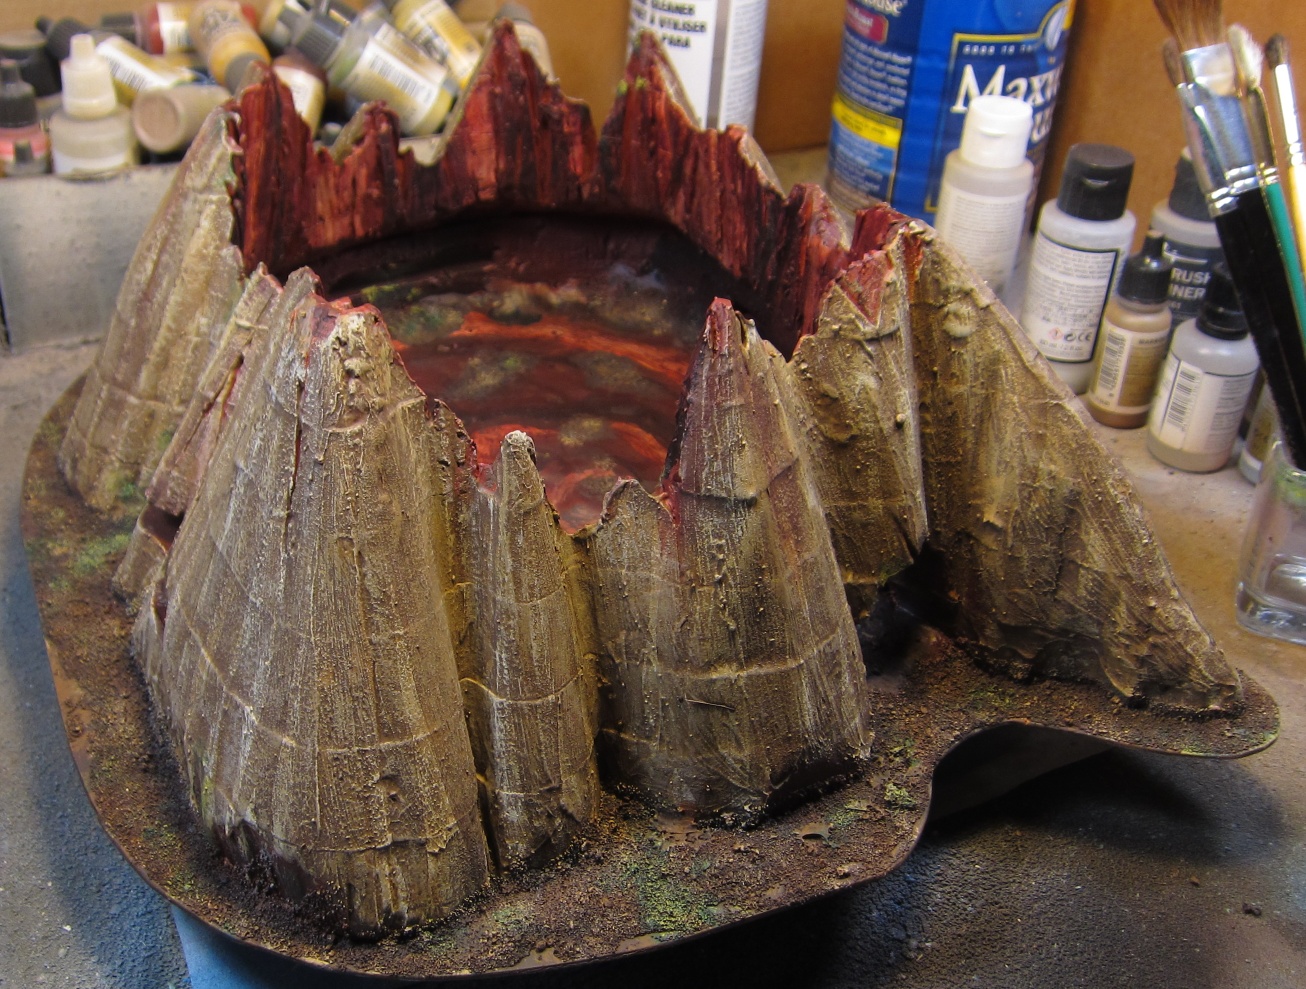
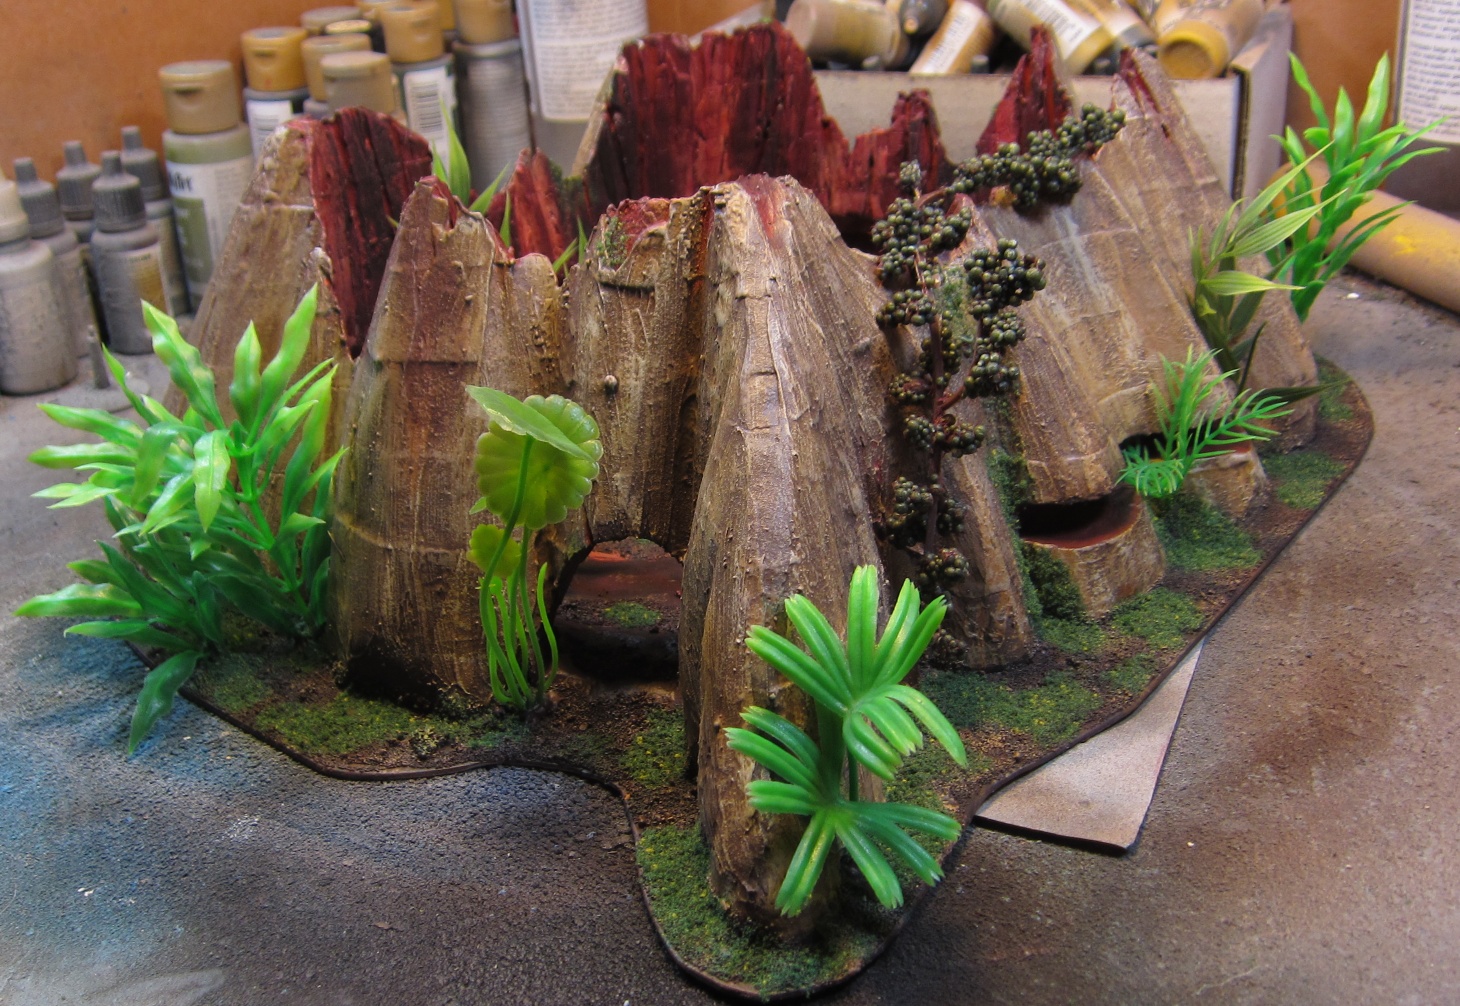
After another day of drying, I basecoated everything with my airbrush - just basic colors as I actually played a game using the pieces the next day - but using the same cheap acrylic paints I used for the rest, mixed with some windex as a thinner. After the game, I started building up the paint properly, going through several tweaks until I was satisfied. Doing the usual multi stage highlight of drybrushing for the bark and ground, but mixing and painting some colored tree rings on the base of the stump, texturing them by layering colors, and then washing over everything because the rings felt too pronounced. Then I drybrushed a redder color over the tree wood for a highlight and striped a dark brown wash around the outside for some more variation and to take attention away from the ridges made by the sliding styrofoam sheets earlier. On the rocks, I did the usual base color and two stage drybrush highlight, but I added some striping of other colors to make it look more sedimentary and more interesting. The lighter layer got a final drybrush of silver for a little sparkle (like quartz crystals) and the browner layer, while I think is the weakest part of this paintjob, got a bit of rust wash, since this was supposed to be an iron-containing layer of rock. Everything then got a nice gray wash on the rocks. The final touches was just a bit of dark green then light green stippling for a some greenery in the paint layer.

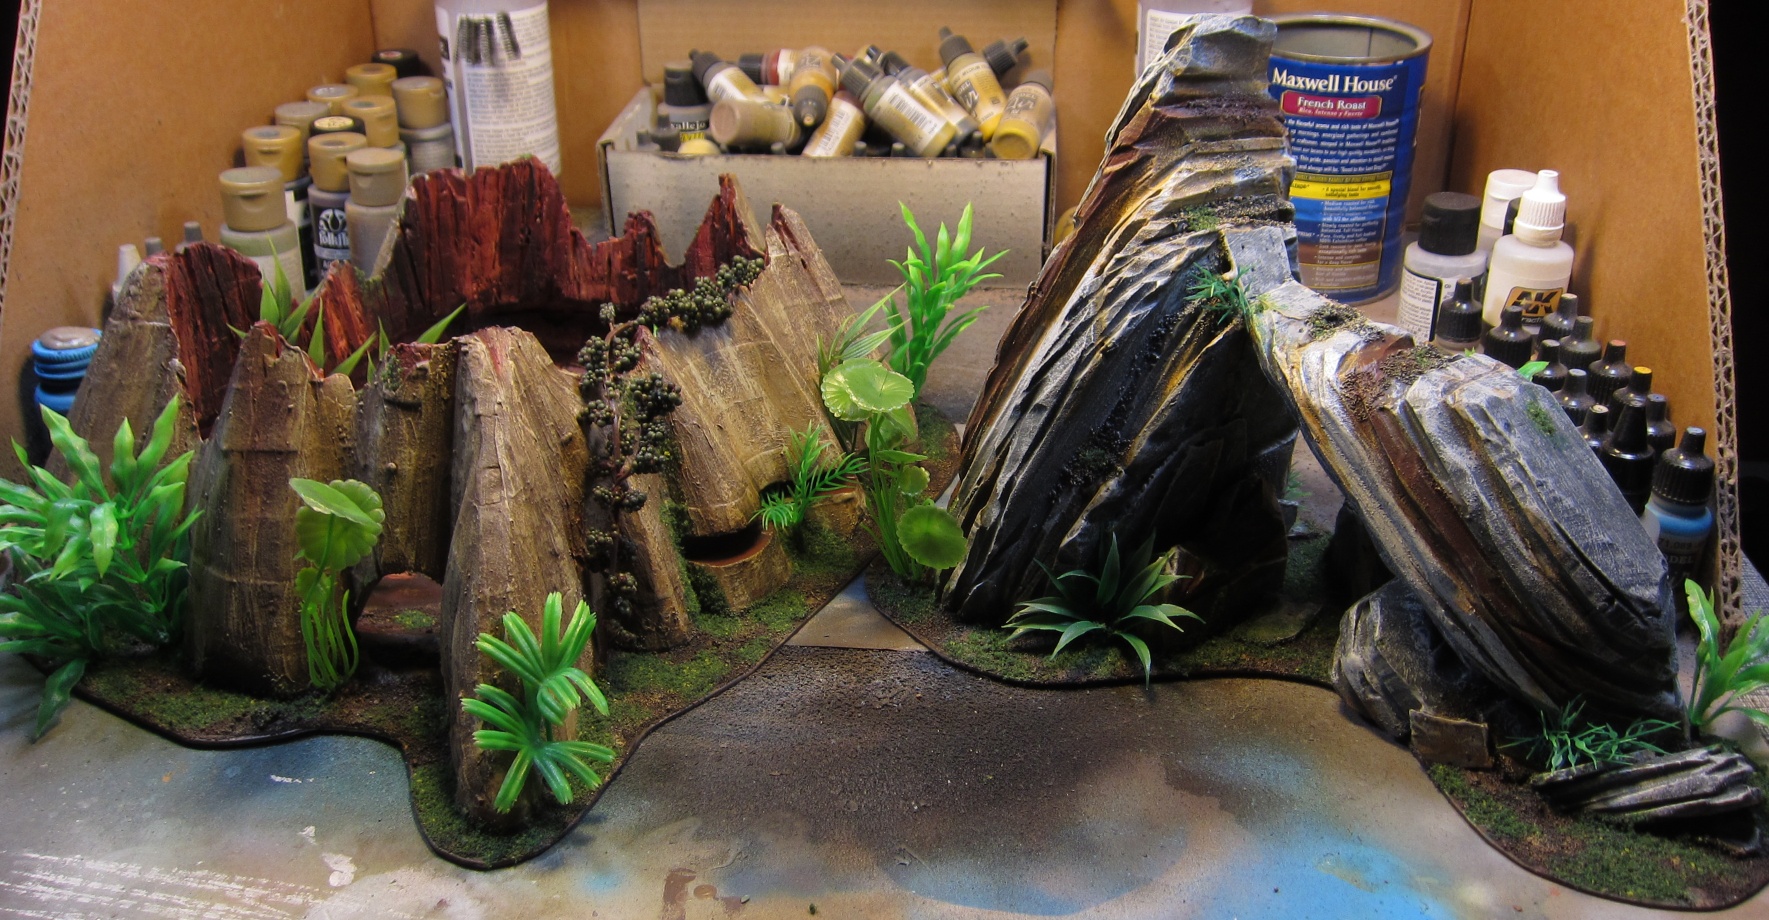
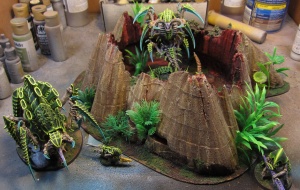
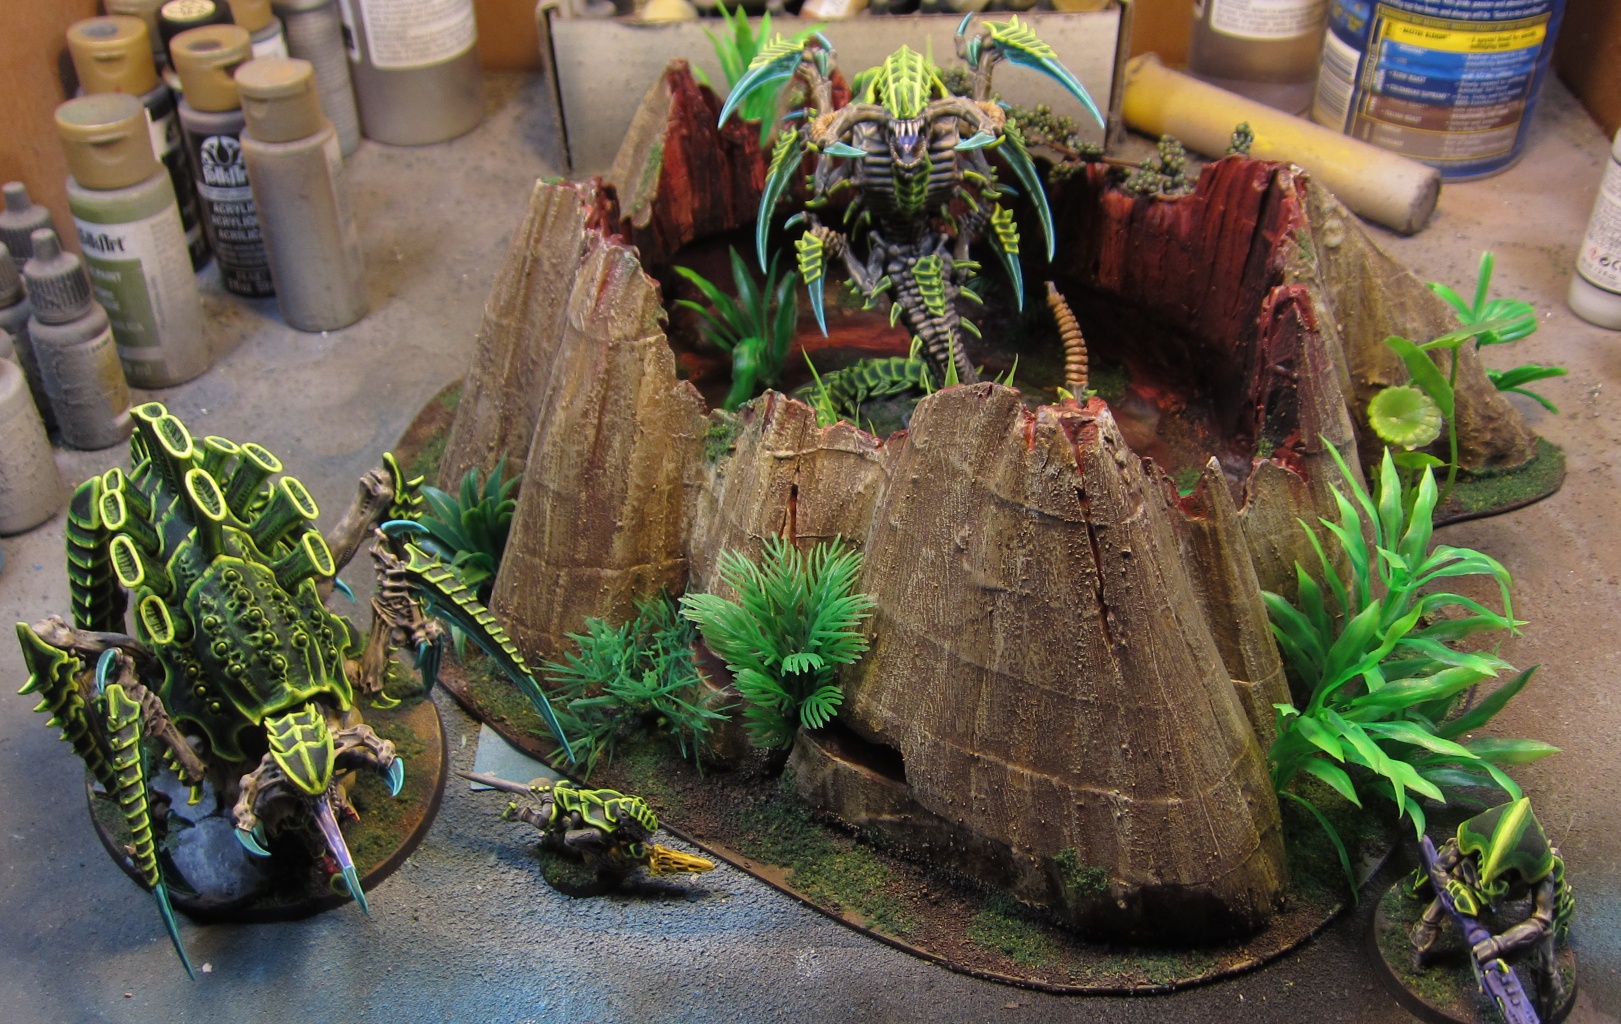
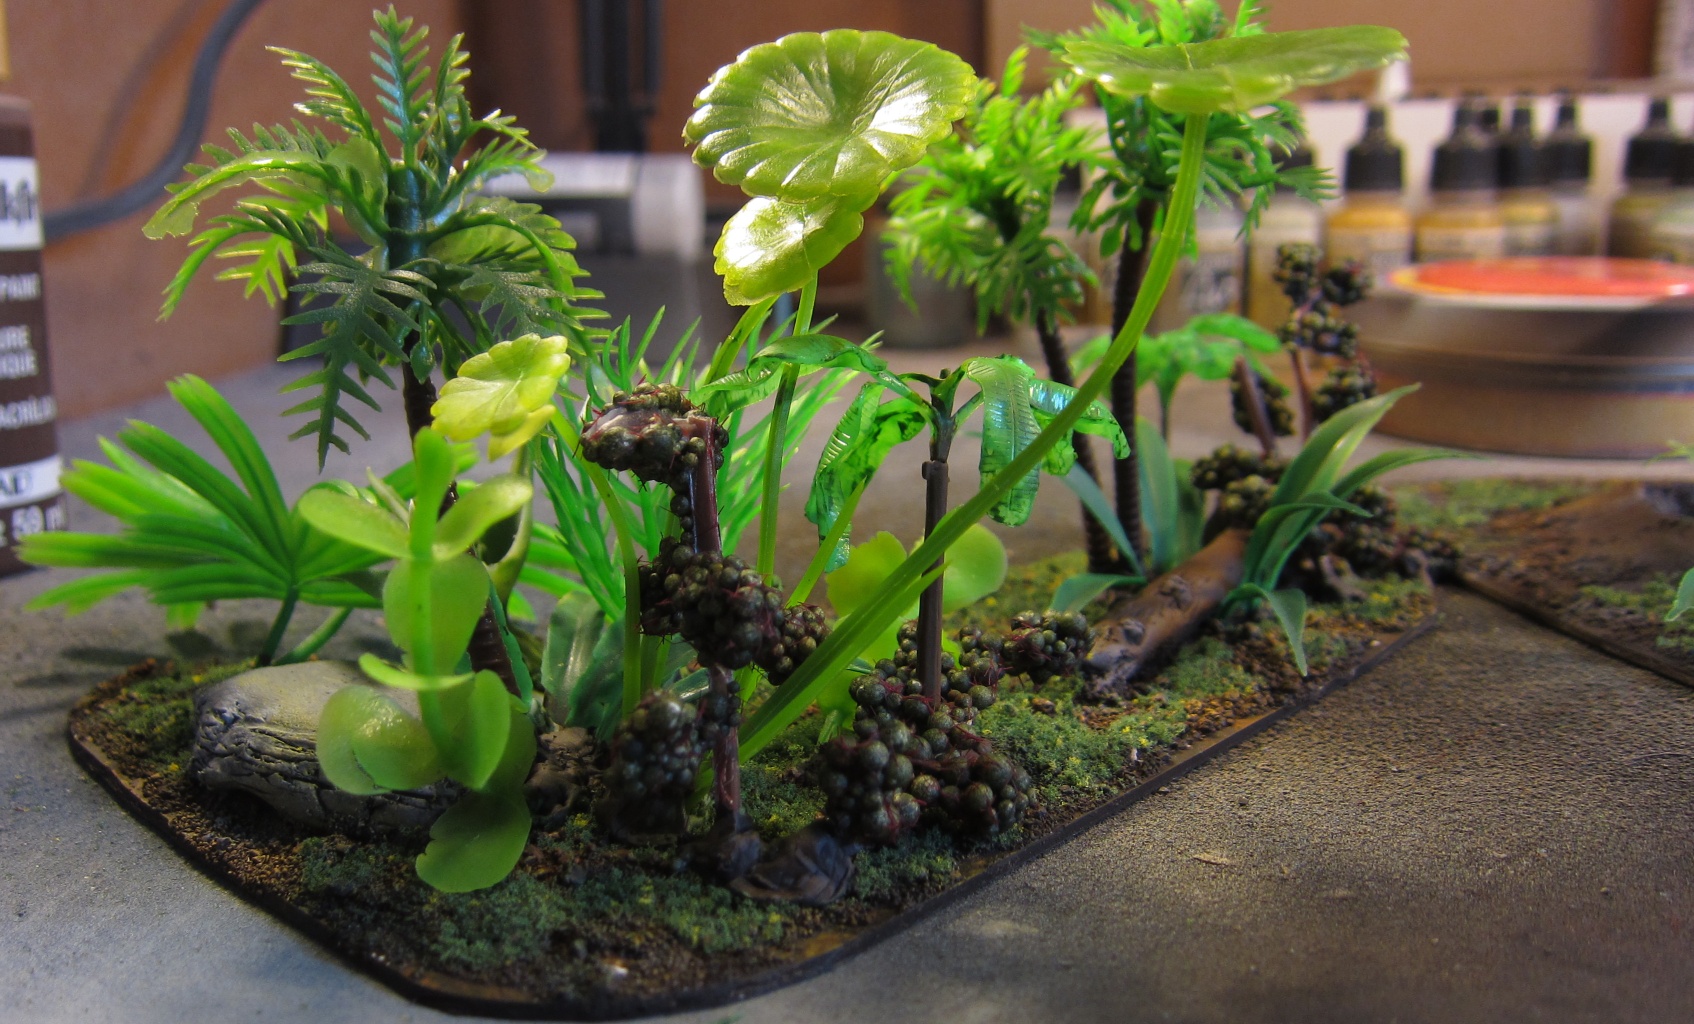
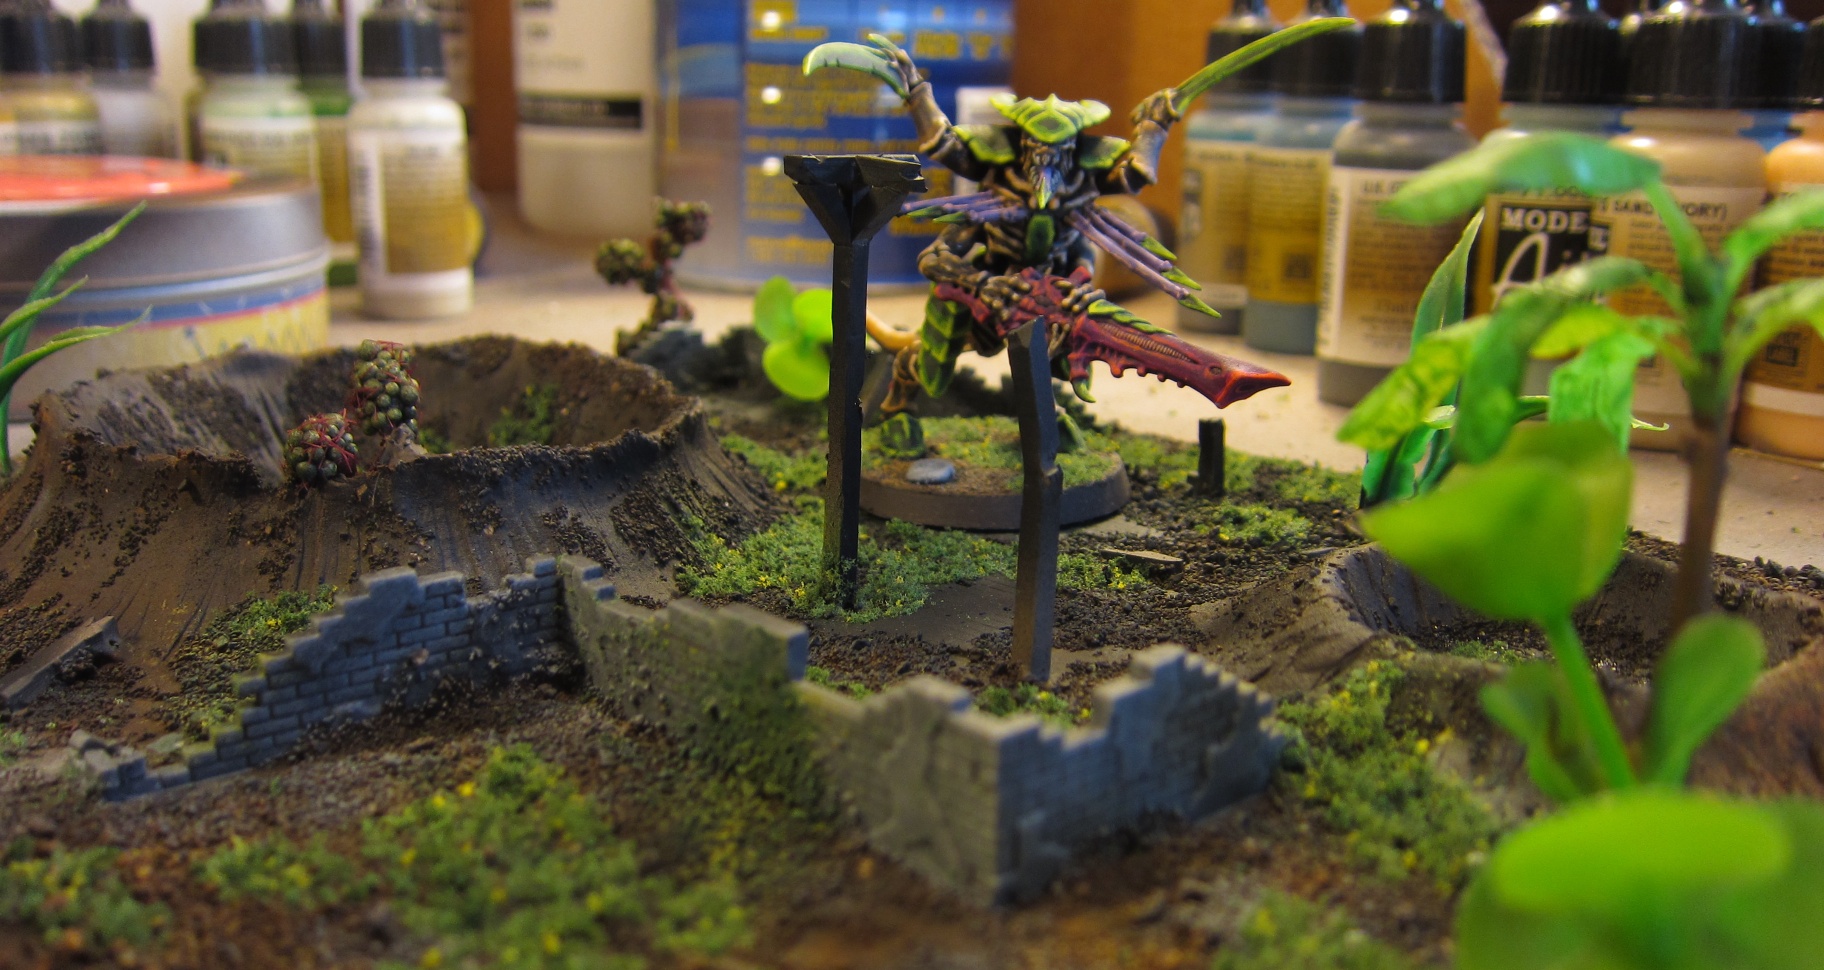
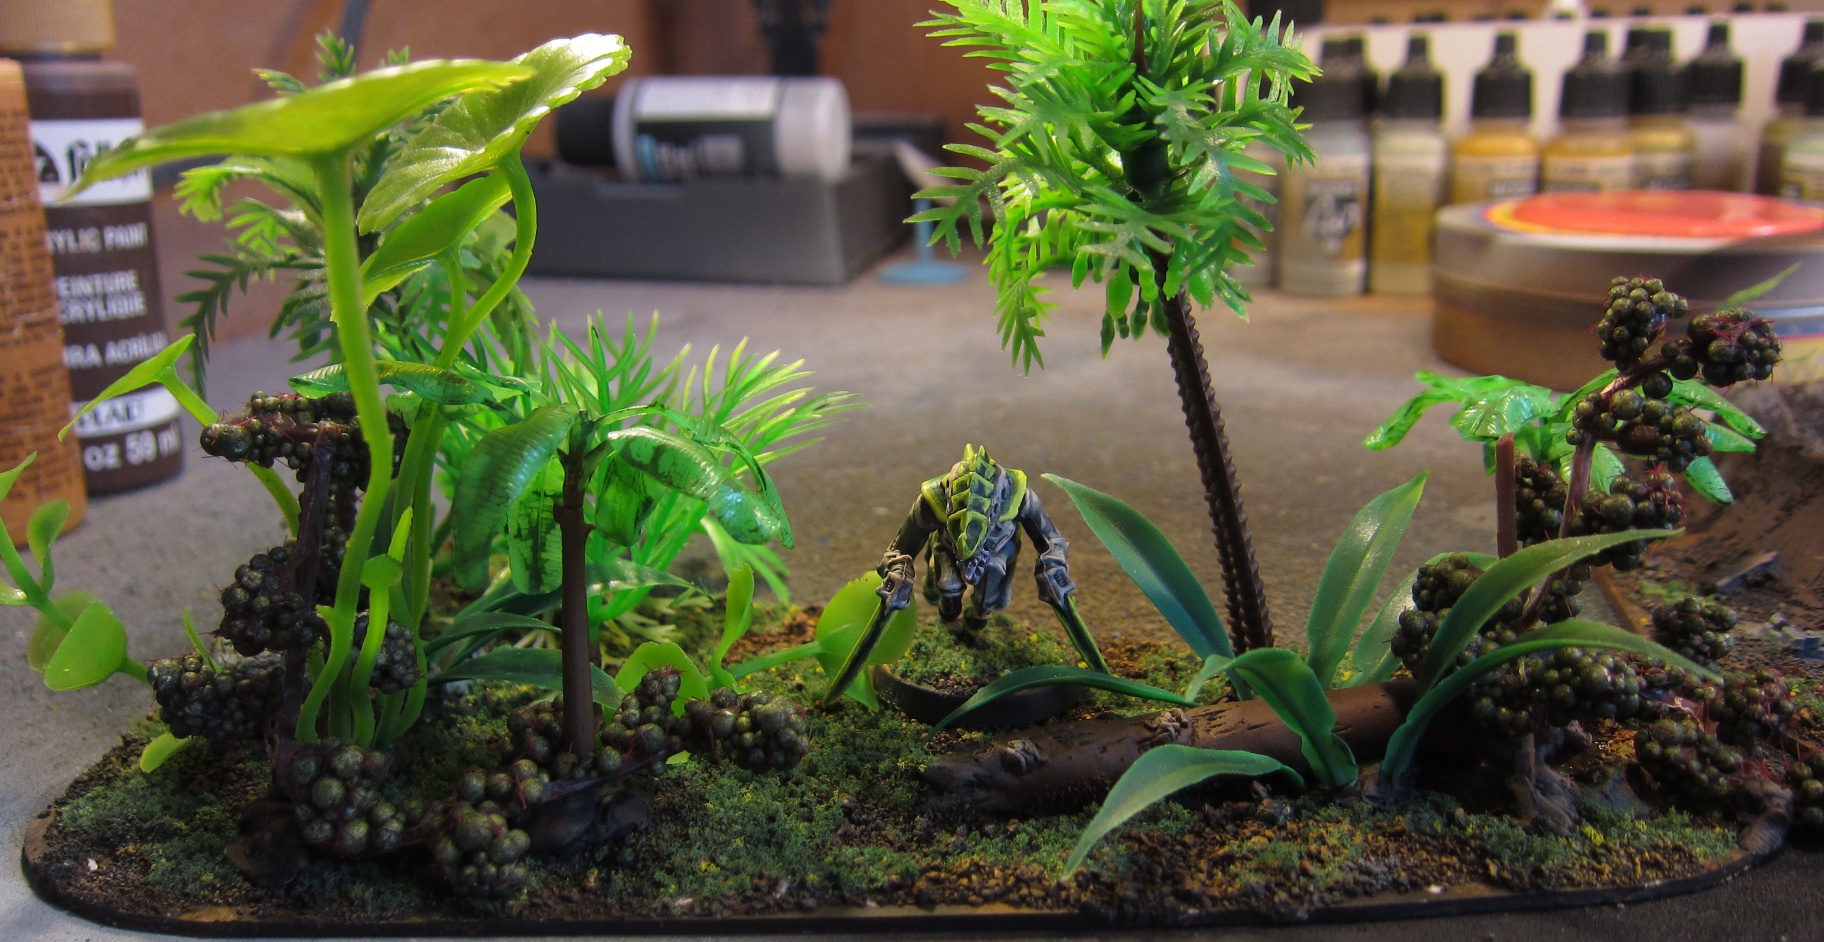
The final step was gluing on the usual aquarium plants for some jungle plants (green stuff on the base, then a dot of glue on it after it dries), painting the mounting point for the plant, and flocking the base with PVA and water to choose the placement. After a day drying, everything got a liberal matte varnish coat and it's ready for the table! Here's a few pictures of each including some tyranids for scale, both of these are larger pieces made to offer direct line-of-sight blocking for vehicles, and I figure I could treat the stump as a proper building with armor values (those giant ironbark trees), or as simple ruins that can fit a squad.


October 25, 2015


The final step was gluing on the usual aquarium plants for some jungle plants (green stuff on the base, then a dot of glue on it after it dries), painting the mounting point for the plant, and flocking the base with PVA and water to choose the placement. After a day drying, everything got a liberal matte varnish coat and it's ready for the table! Here's a few pictures of each including some tyranids for scale, both of these are larger pieces made to offer direct line-of-sight blocking for vehicles, and I figure I could treat the stump as a proper building with armor values (those giant ironbark trees), or as simple ruins that can fit a squad.
October 25, 2015
Simple Smoke Plumes for Warhammer 40k
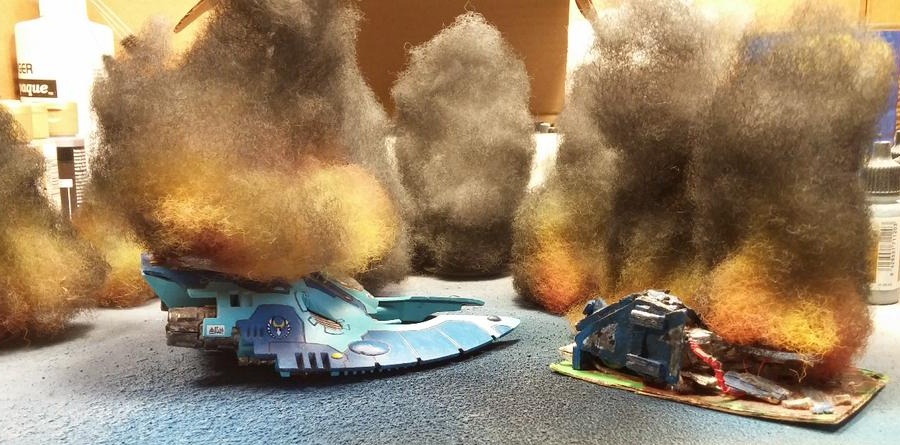
Here's a real quick tutorial for how to make smoke plumes like these. They are extremely easy to make and are very inexpensive and they make the battlefield look better (and work well for showing when you've popped smoke launchers, too). For materials, you need only some polyester pillow stuffing (fiberfill), some paint, and though it's not required, some spare flying bases.
Take some fiberfill and make your smoke shape, almost anything will do, but making it wider at the base will help keep it upright. Once you get a good shape, you're ready to paint! Dark red on the bottom, some orange a little higher, and yellow as a final highlight. Bleed over a little into the areas you don't want it so each new color overlaps, that means after these three you'll have more yellow than the final coloring - this will keep the white of the fiberfill from showing through in the final product. I went with light gray next, though either way would probably work, and then black at the end. I went with this to blend with the white fiberfill, making a little lightness visible on the inside, but going full black and then highlighting with lighter would look good as well. Use some of your smoke colors over the fire portion to make it look like smoke is coming from the side of the blaze. For an alternative (like for smoke launchers instead of just wrecks), you can just leave off the fire portion of the coloring.
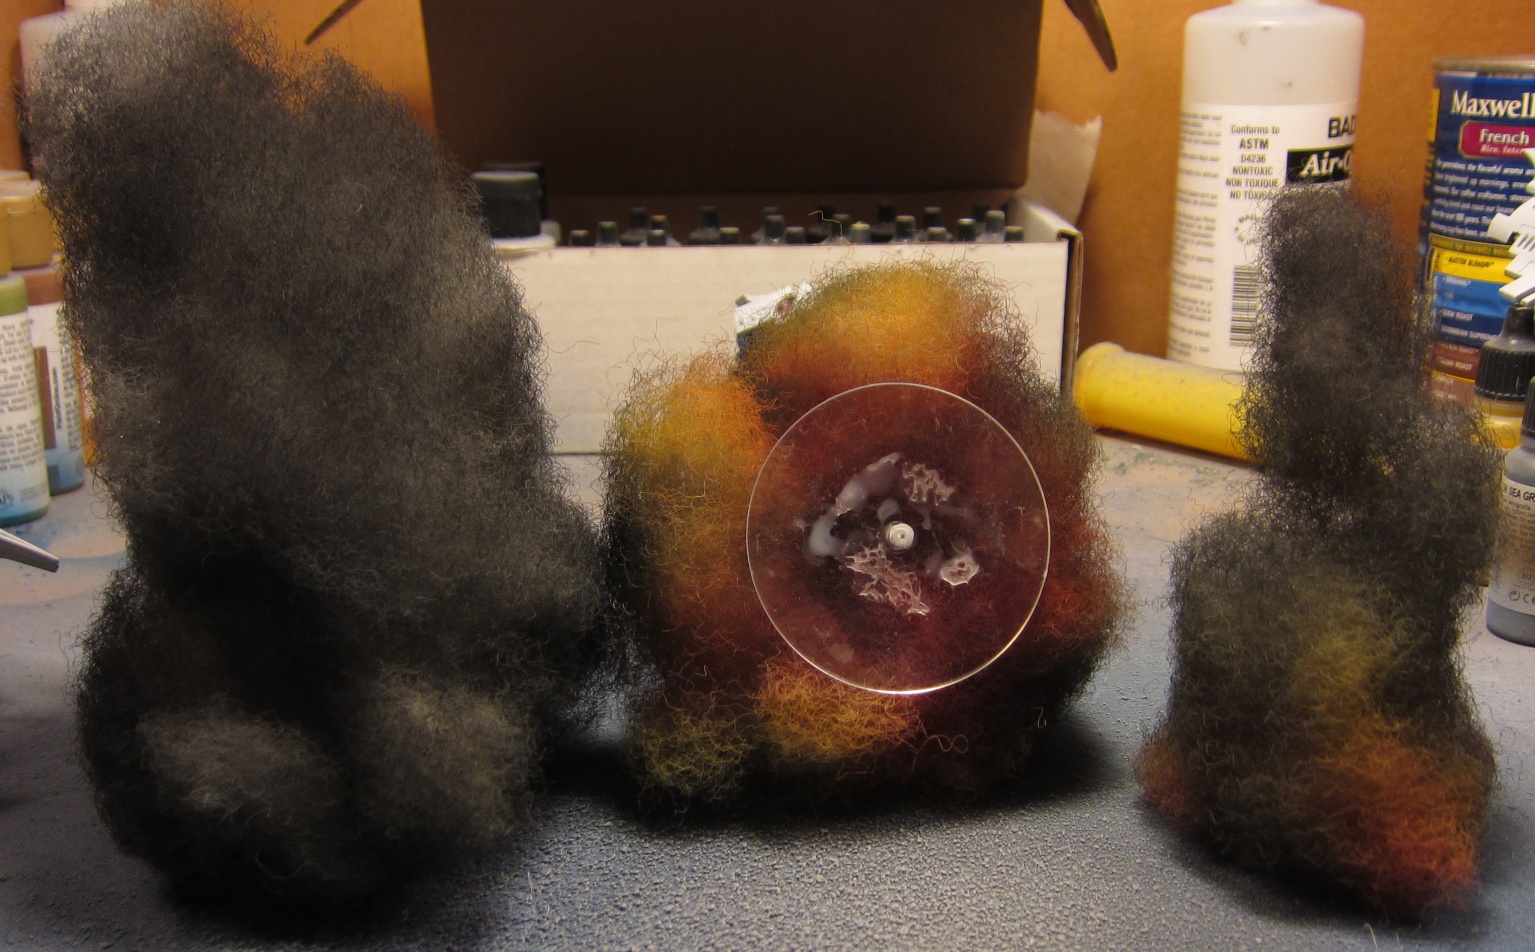
As a final step, coat a flying base in PVA glue, then put a little on the bottom of the plume and stick it in. This helps weight the bottom to keep it upright and gives it a little more structure, but the paint will actually do a good job stiffening up the fiberfill and keeping it from sticking to everything as much. A final matte polyurethane coat keeps everything uniform and together, and you're done!
Febryary 13, 2015
Two Large Ruined Jungle Buildings
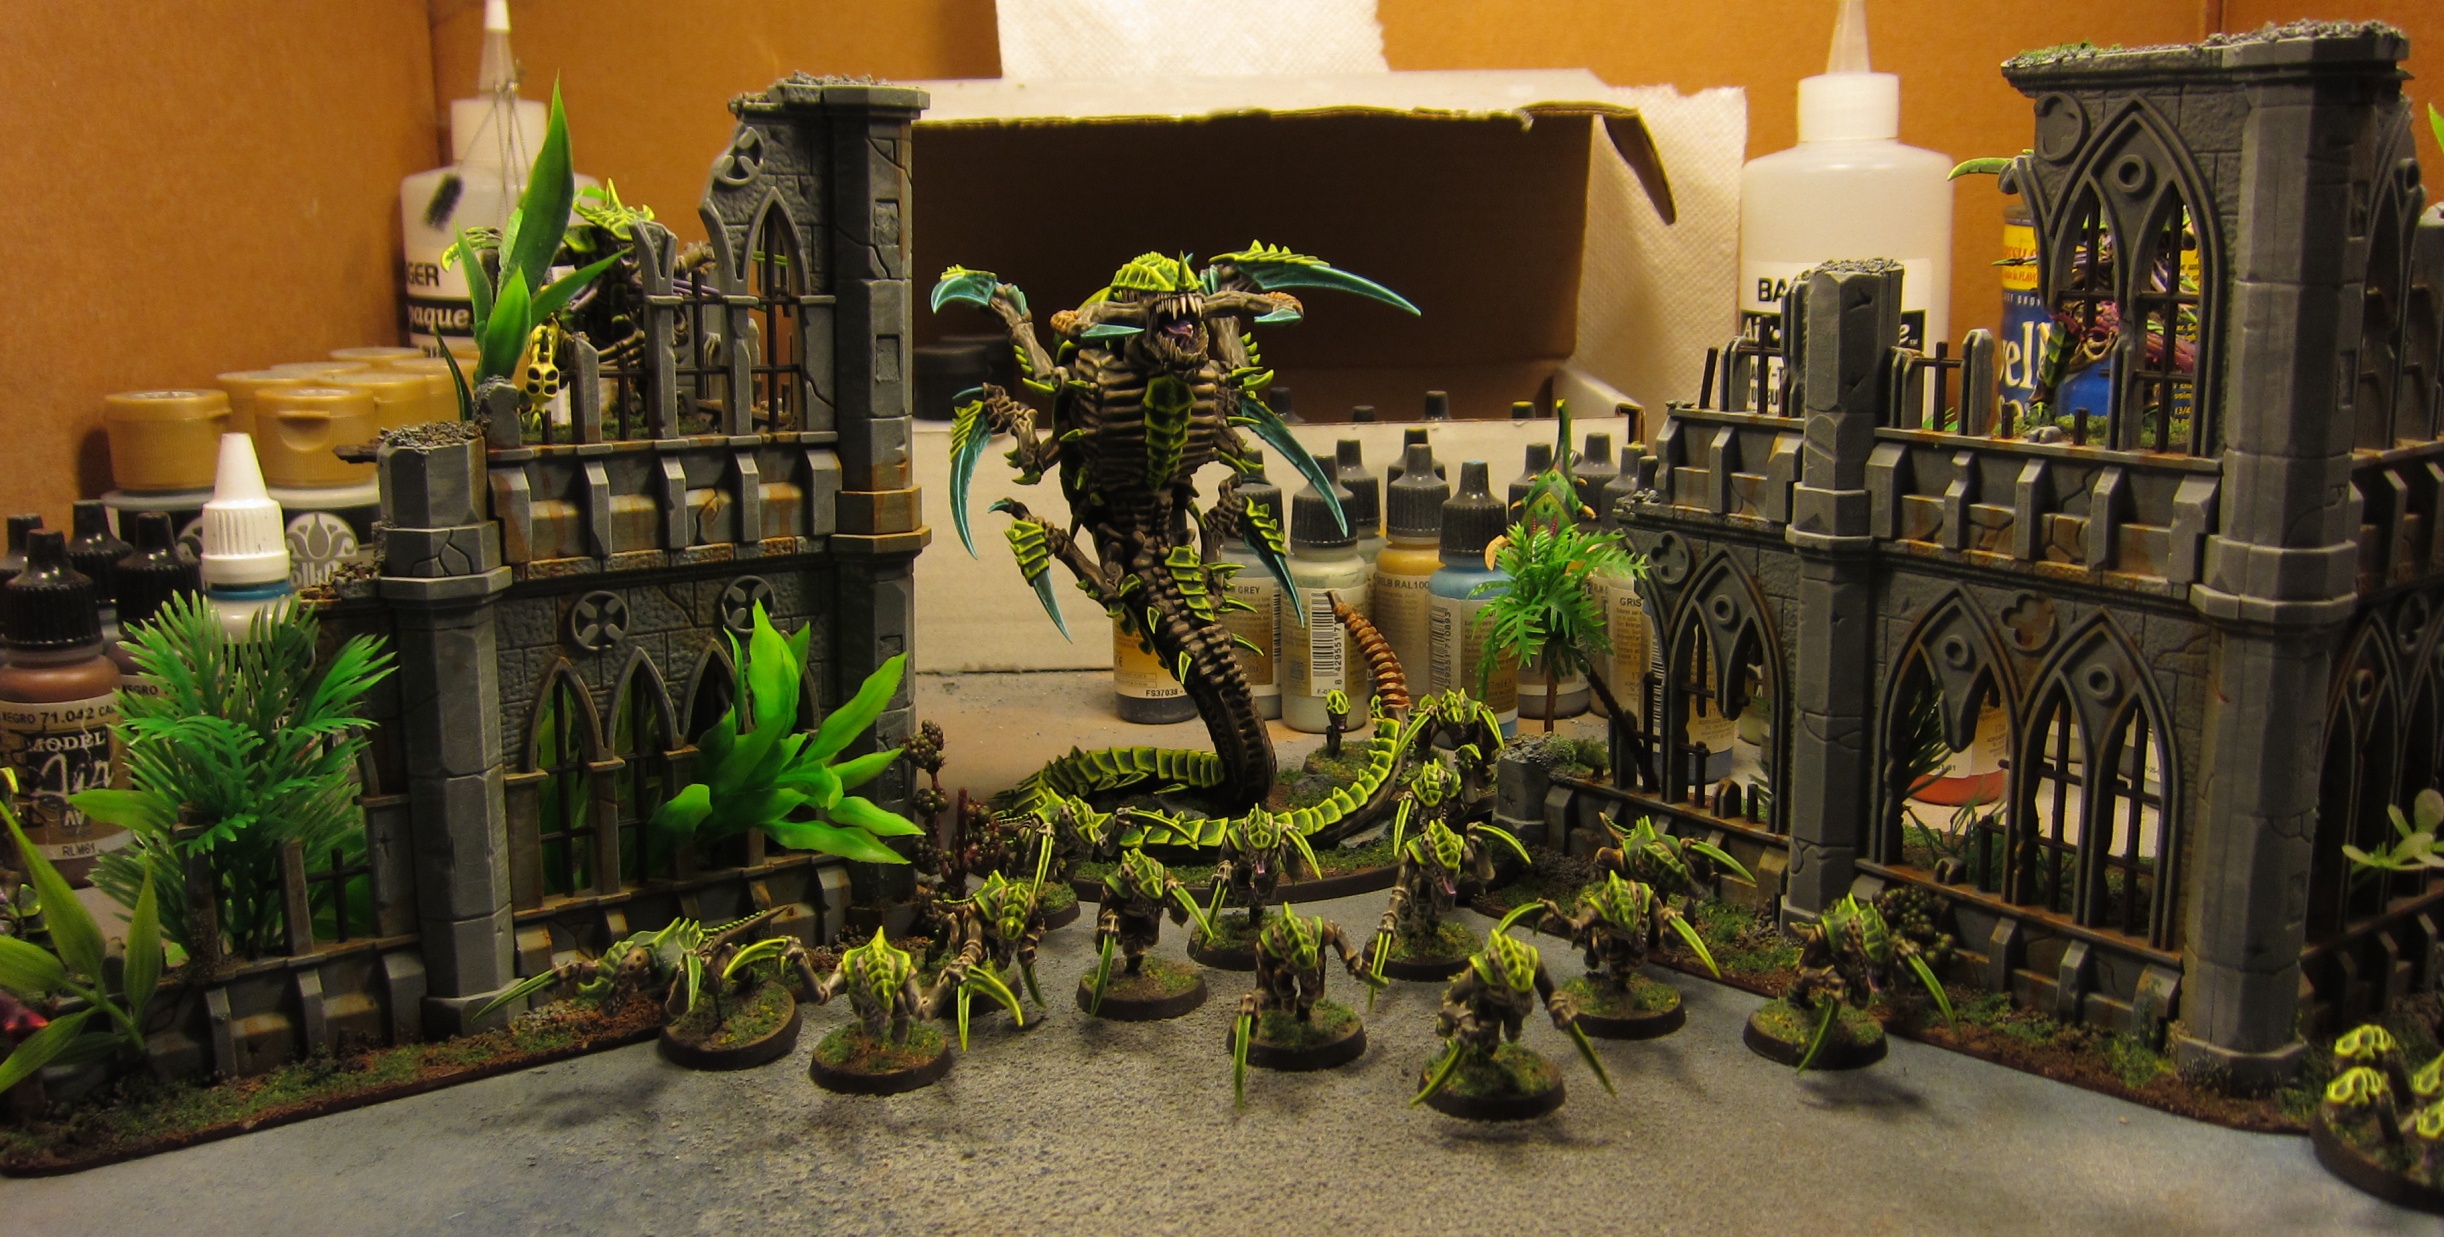
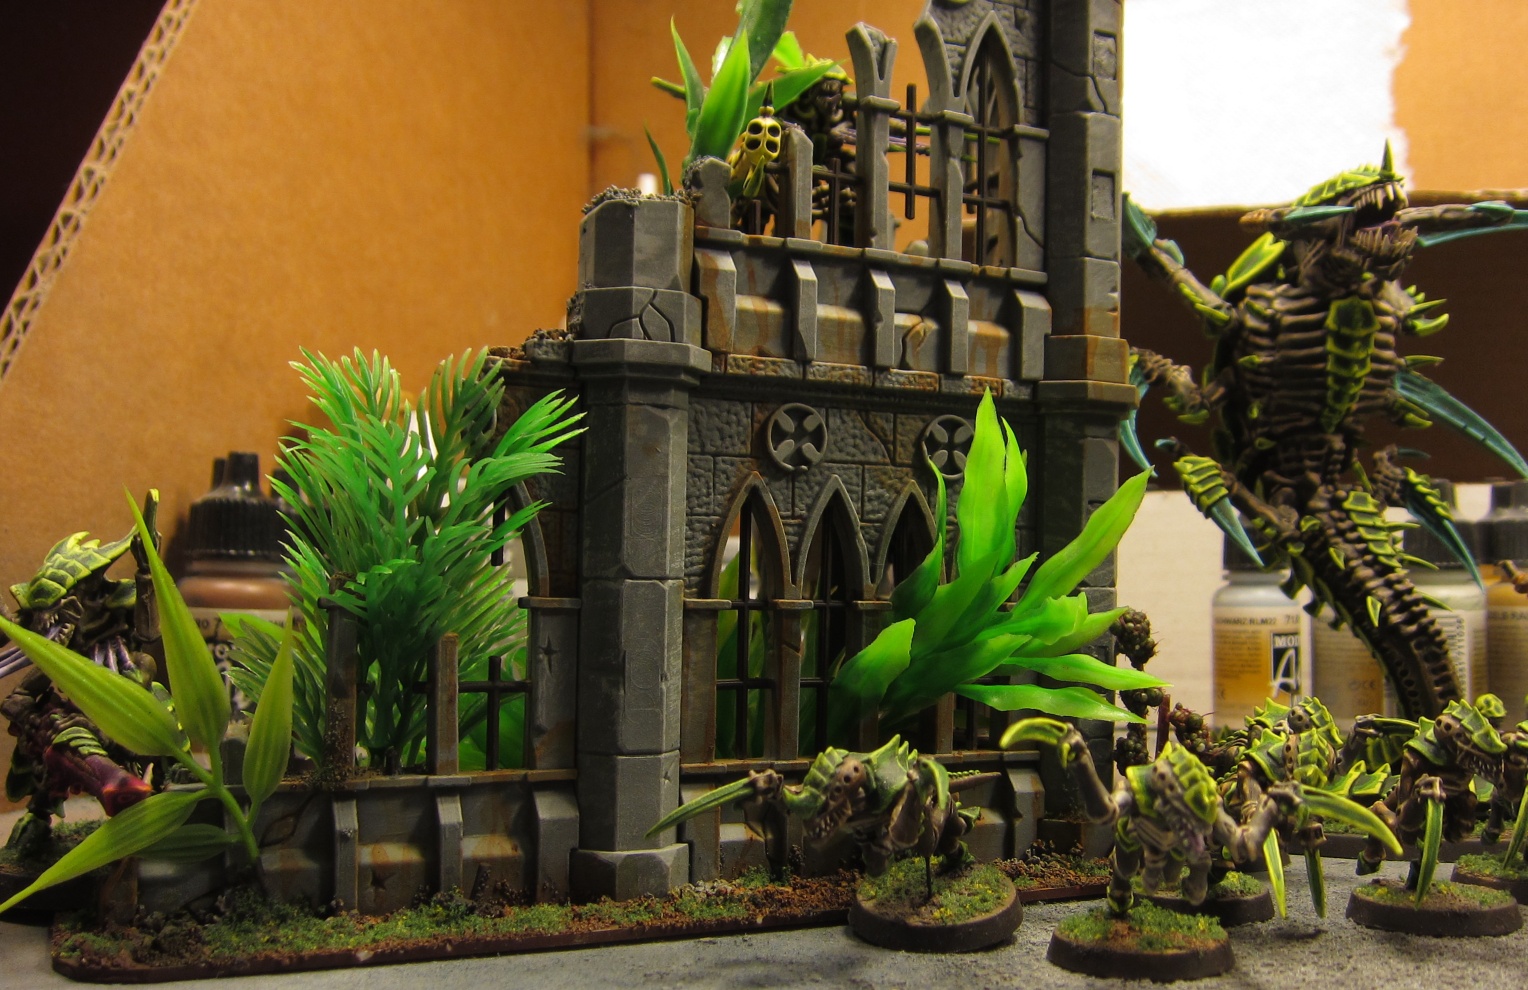
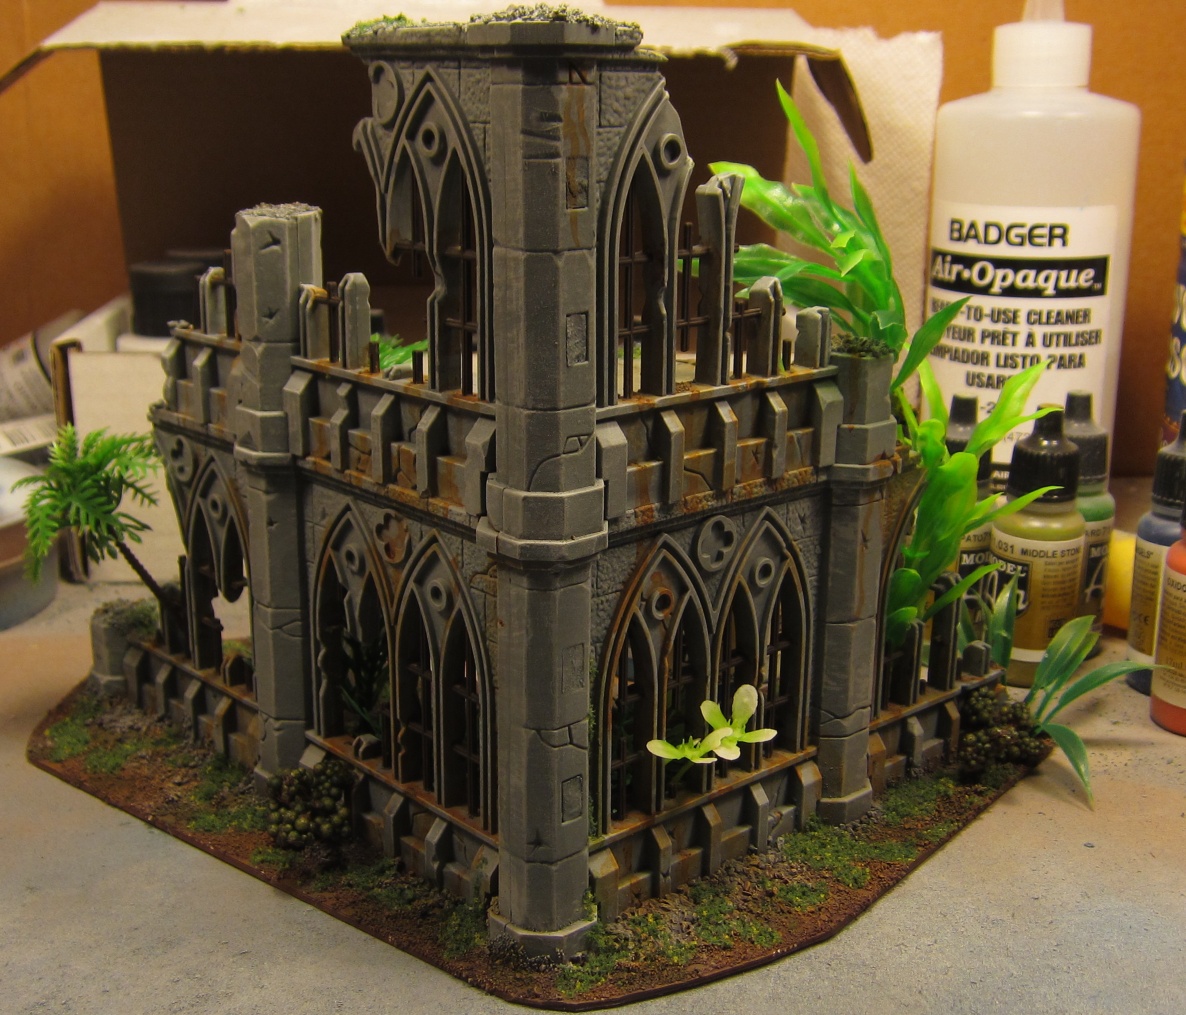
A pair of ruined buildings based off a Pegasus Hobbies ruined Gothic building kit. Built up in much the same style as earlier jungle terrain, but thanks to the model detail and some extra painting, weathered to look the best of any of my terrain so far. I'll outline the steps I took to make them, but this is mostly about showing off pictures of my work.

The process for each building was about the same. I cleaned up the sprues built the kits (slightly modified the top level on one). I glued the kits to some sheet plastic base, then glued down the normal texturing mix of sand and talus I use on my bases - I used some on the building itself for a little extra texture and made a few small piles of coarse talus material for again more interest. I also plugged the holes in the side of the kit's largest column - it lets you assemble it on both sides, but then there's a set of holes on the opposite, so I filled them with air-dry clay, let the plugs dry, and glued them in place.
 Following drying everything, I sprayed on primer, then did the dark brown for the base, a dark gray on the building, a lighter highlight on the building, and then touched up the brown base and did a single highlight layer on it. This let me control the overspray on the building on parts where the airbrush didn't have great access. Next up is drybrushing, a sort of orchre yellow on the dirt and a light gray-white on the building. Following that, I blended some brown, red, and orange to get a fully-oxidized iron (rust) color and painted the muntins (the bars between the panes of the windows, if there were any glass) as well as the girder bars holding up the second level. I went back to touch up some of the walls to finish off the basic paint job.
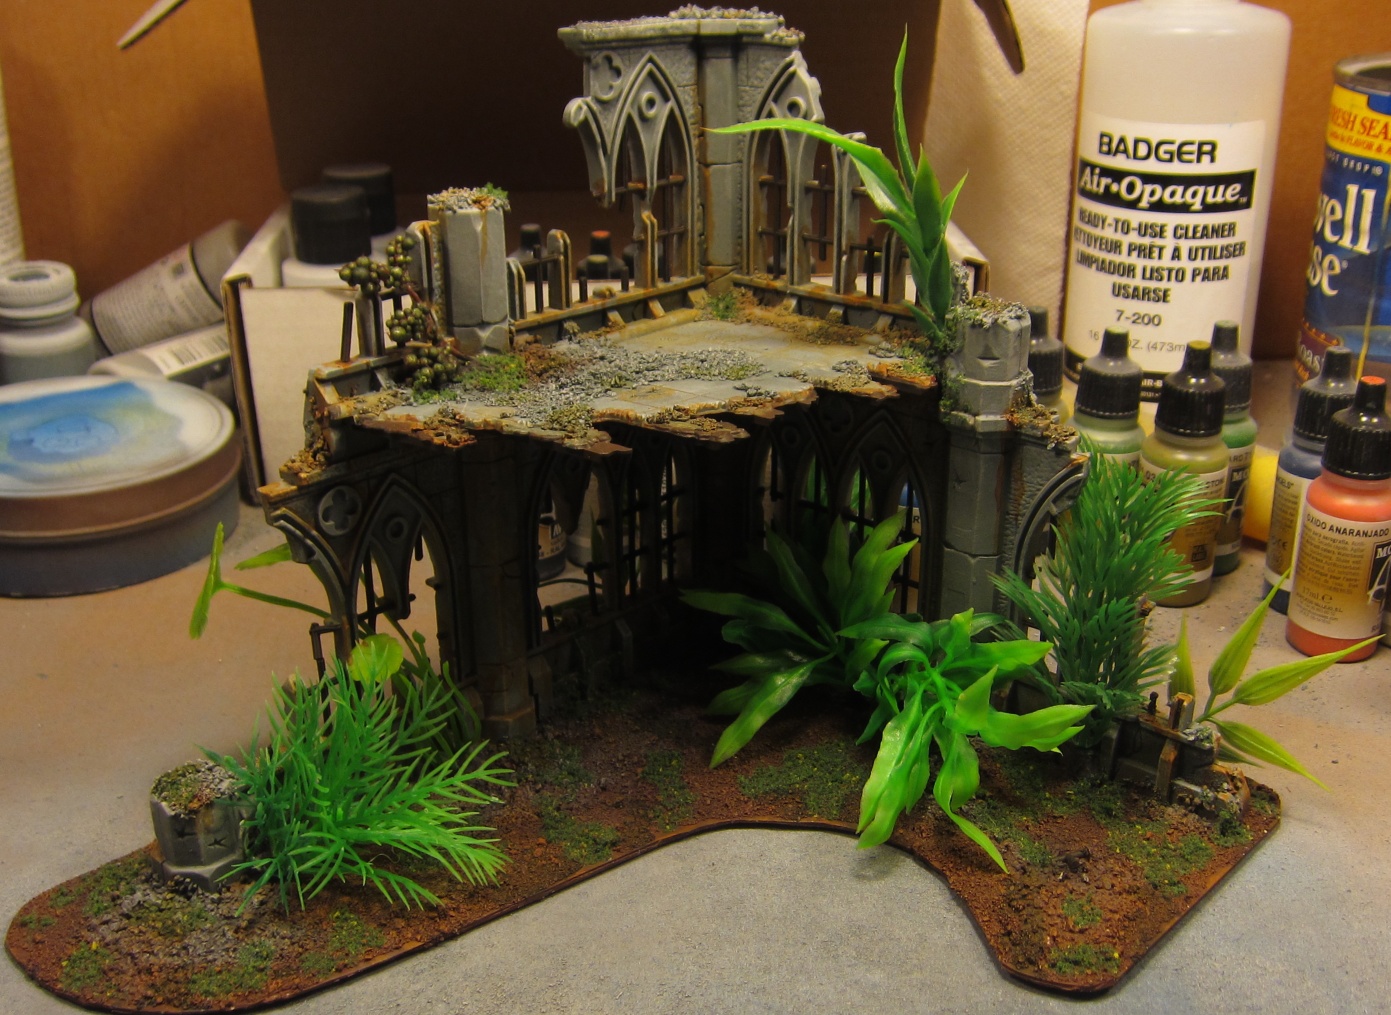
With the basic colors done, I set out on the weathering, which was basically the new part of this build. I used a rust wash (Vallejo light rust wash) slightly watered down to make drips from the iron parts of the windows and drip down from various cracks and things. I tried to show some trails, some divergent paths, some little pools, and some drips that didn't go down the wall, just a line up to a ledge, then resuming it below. The first layer looked nice, but was not very pronounced, so I went back with the wash without watering it down and made some finer drip lines in the existing ones for much more definition. Following the rust, I went over much of the stone with a gray wash (Vallejo gray wash) slightly watered down to give some variation in the stone color. I also did a little bit of streaking like the rust to emulate the look of old stone structures, but it's not particularly pronounced. I used this wash some on the ground to add a little more contrast and color variation. Finally, I went over a few areas with a dark green wash - it didn't look as pronounced after it dried, but the color variation is a nice step and it again darkens crevices to give some depth.

With my freestanding painted ruins, I went about making it jungle terrain. I used the usual method of taking pieces of aquarium plants, encasing the base in green stuff epoxy putty, sticking them in place, and then super gluing the base again when dried (plant to putty and putty to ground). I tried to weave them around the building to make it look overgrown, but tried to keep the ground mostly clear to allow models to be there - I want it to look nice, but I want it to play well. With the plants in place, I put down a bunch of PVA glue mixed with water and flocked everything to get some more texture and greenery. After a day to dry, everything got a coat of matte polyurethane for protection and we played on it the next day! The scale of the building makes for very tall levels for 40k scale, but given the grandiose Gothic style and the need for space for large models in the game... it works out well.

Febryary 12, 2015
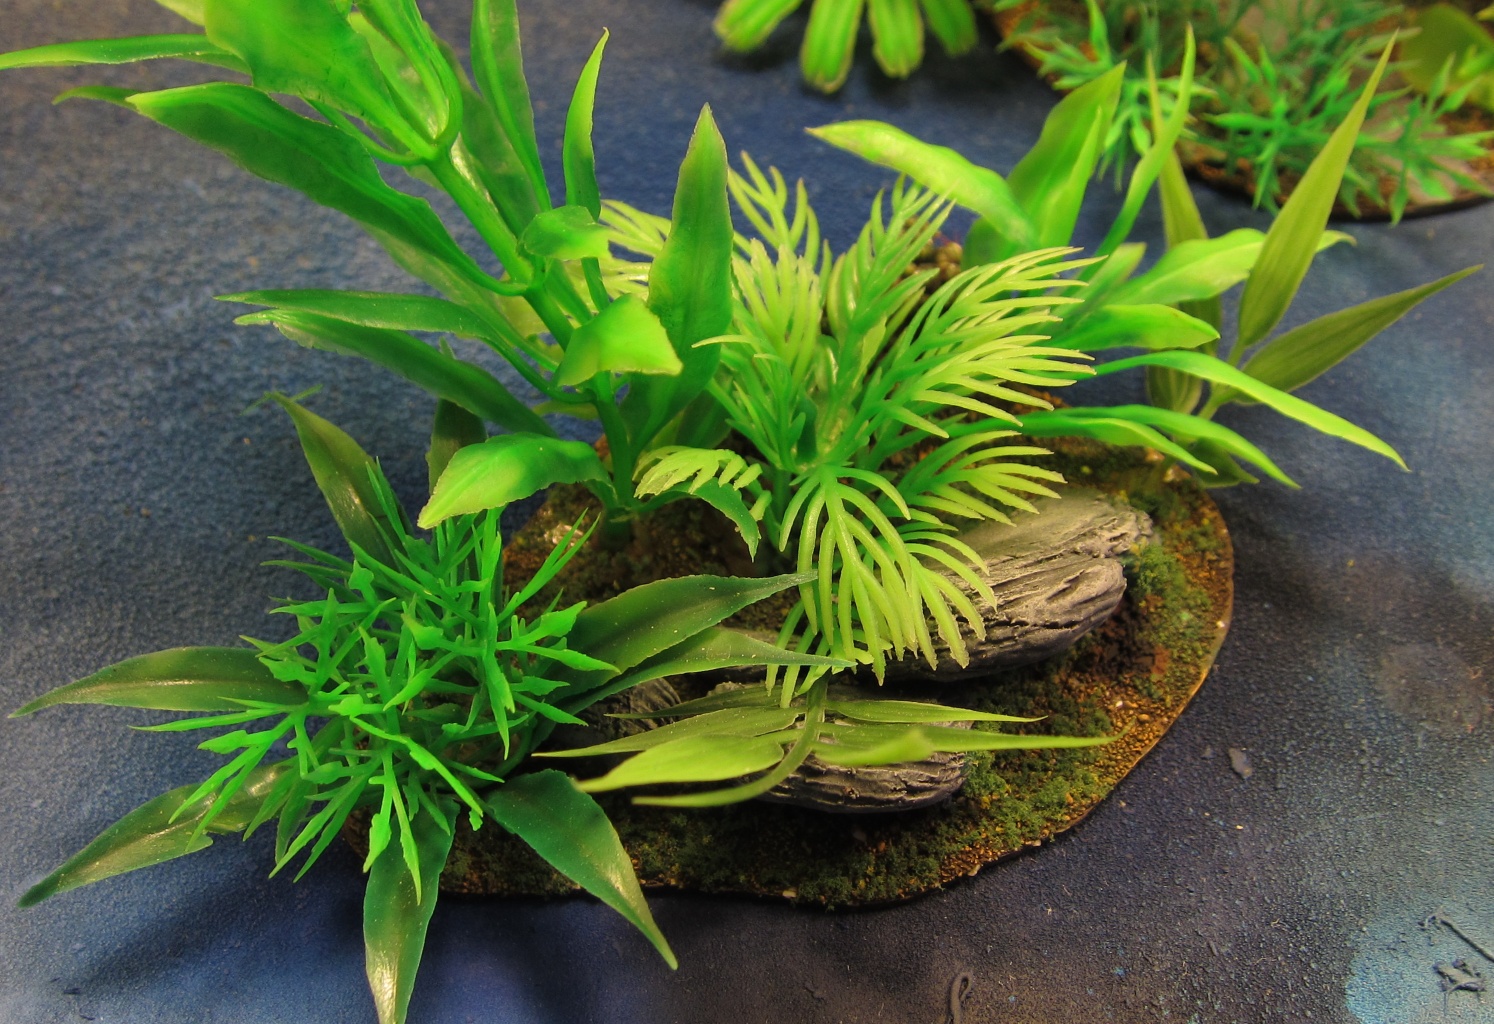
Two Small Jungle Terrain Bits
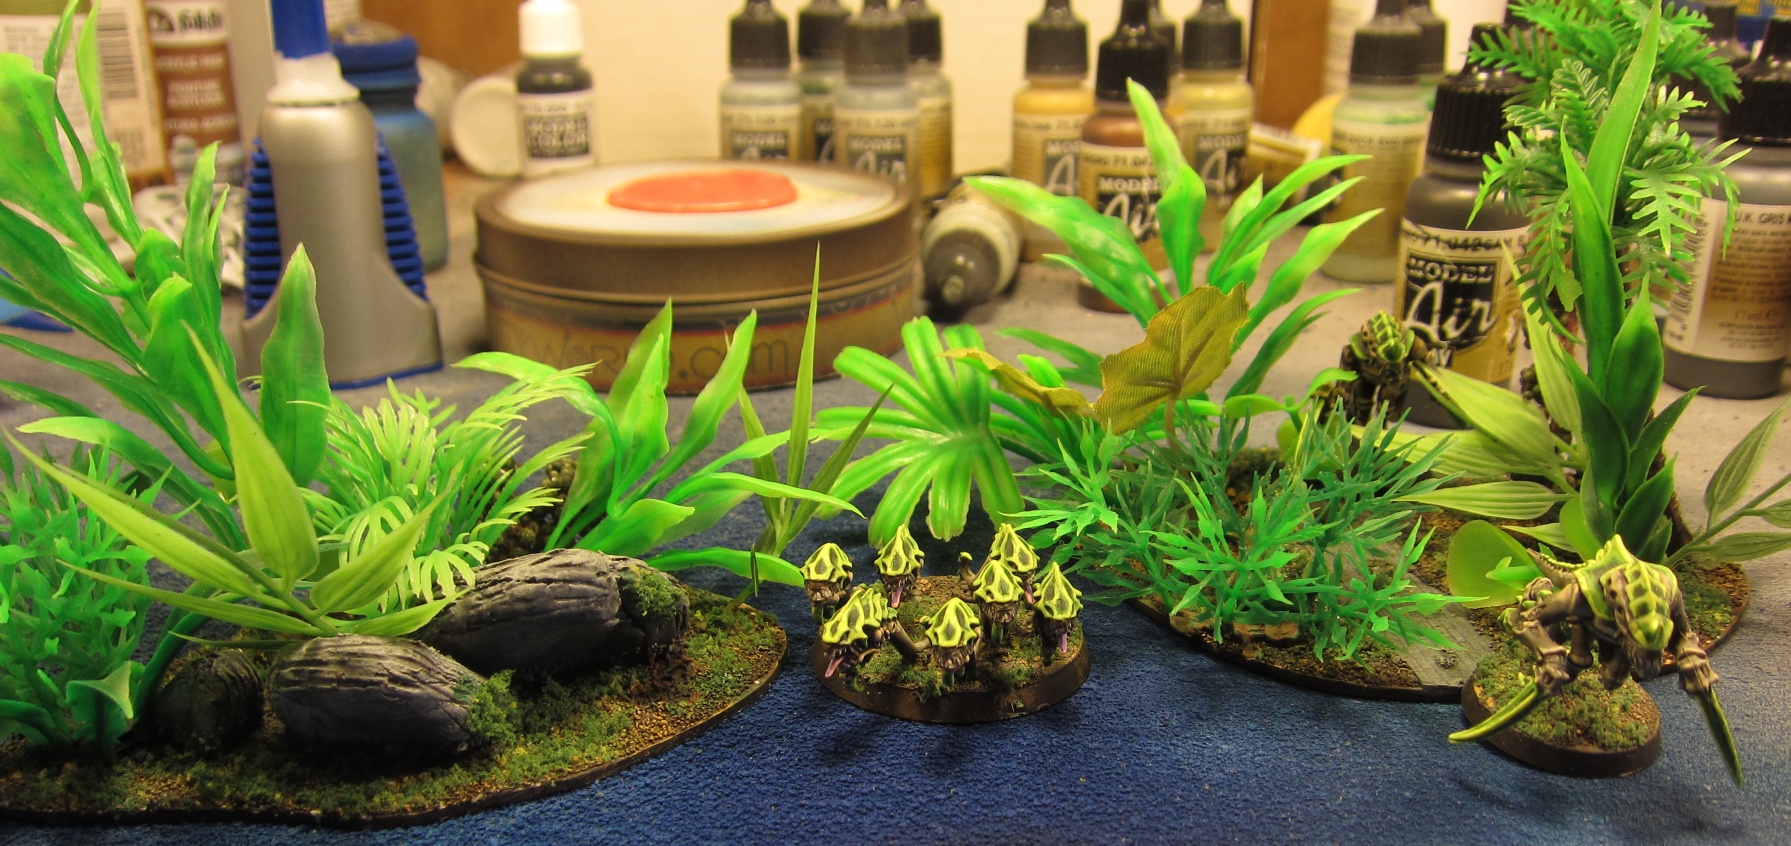
Two new small installments to my 40k jungle terrain set themed after my tyranid army. These small features provide some light cover and interest for the battlefield, but aren't large enough to represent large objectives or completely block sight lines. I've run into a couple of problems making these, namely, the white glue used to attach the sand texture layer to the plastic base can delaminate with a little flexing of the base and that some of the taller plants are tough to keep going straight up - they were meant to hold themselves up when submerged, after all. Coming pieces will have some intended fixes, but while I have some ideas, these are basically built using the same methods as the last pieces.
November 19, 2014
Jungle and Ruins Terrain for Warhammer 40k
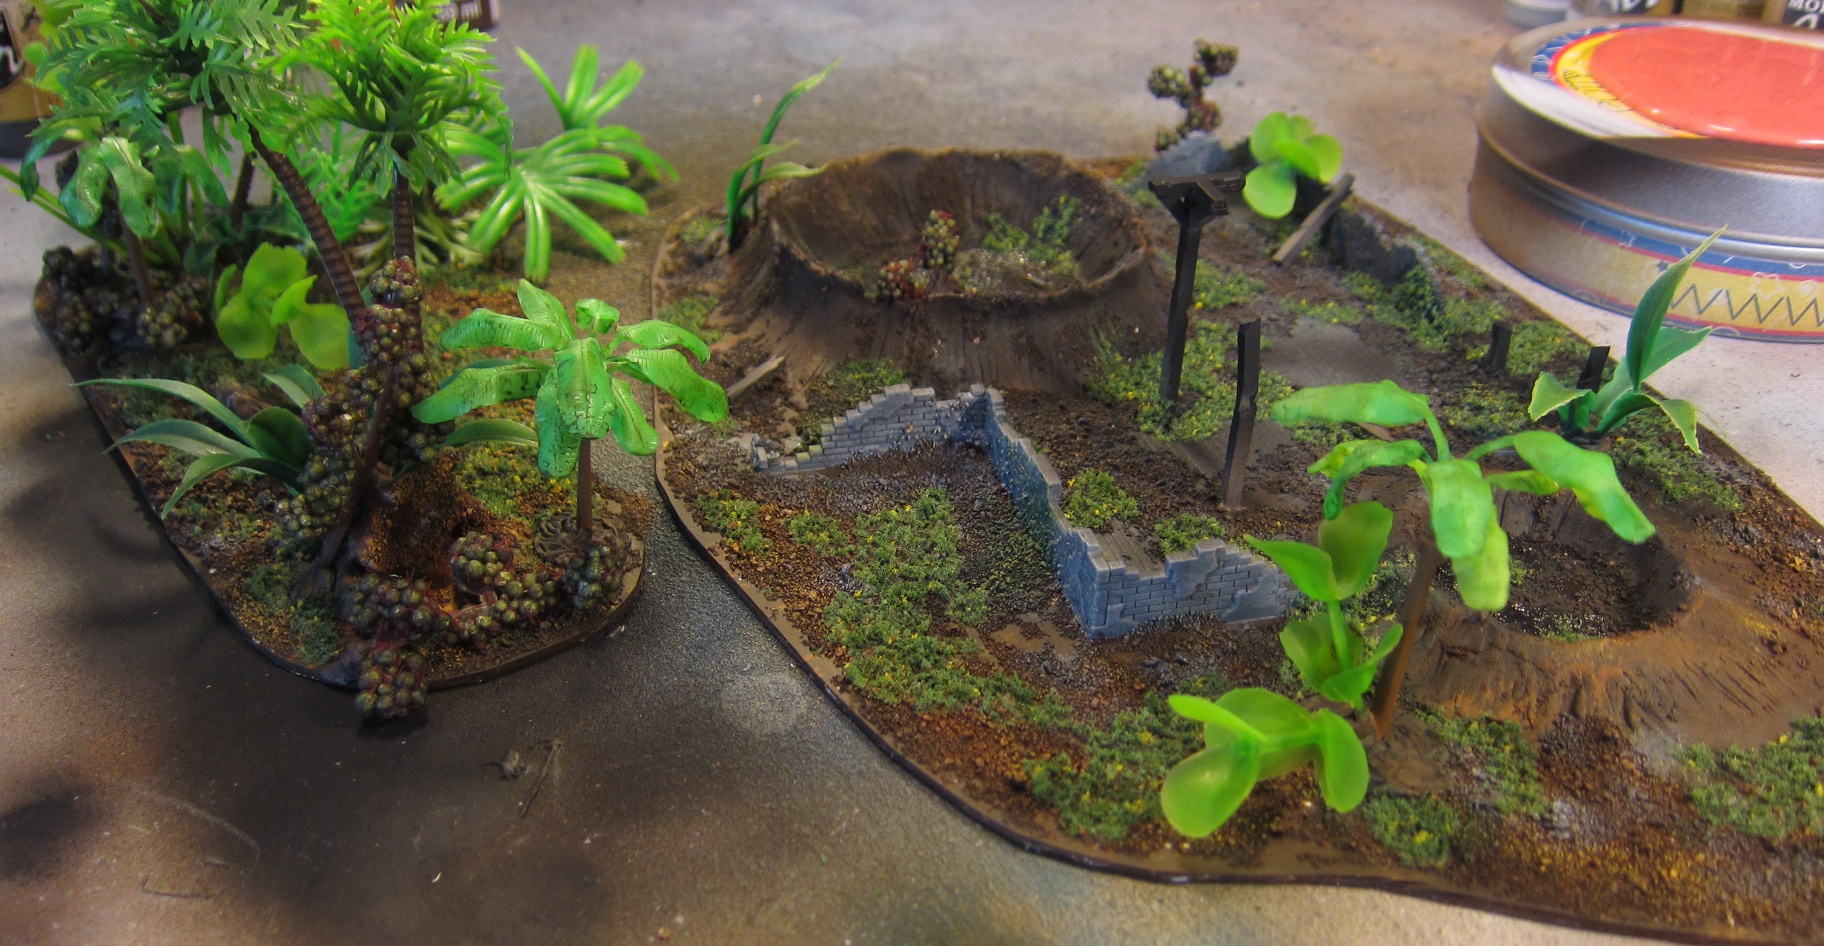
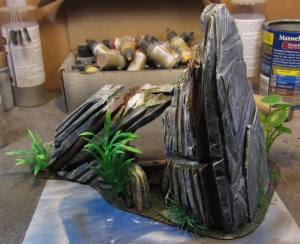
I've been gathering parts for a few weeks, and this past week I managed to get enough of everything to move forward and start making some terrain for my tabletop battlefields. I wanted to make a set of jungle themed terrain, with some primitive ruined structures or evidences of past wars, to go with my tyranid army, matching their paint scheme. There's still quite a few pieces to be made, but I think these are a good start and represent a notch or two better quality terrain than I made years ago.
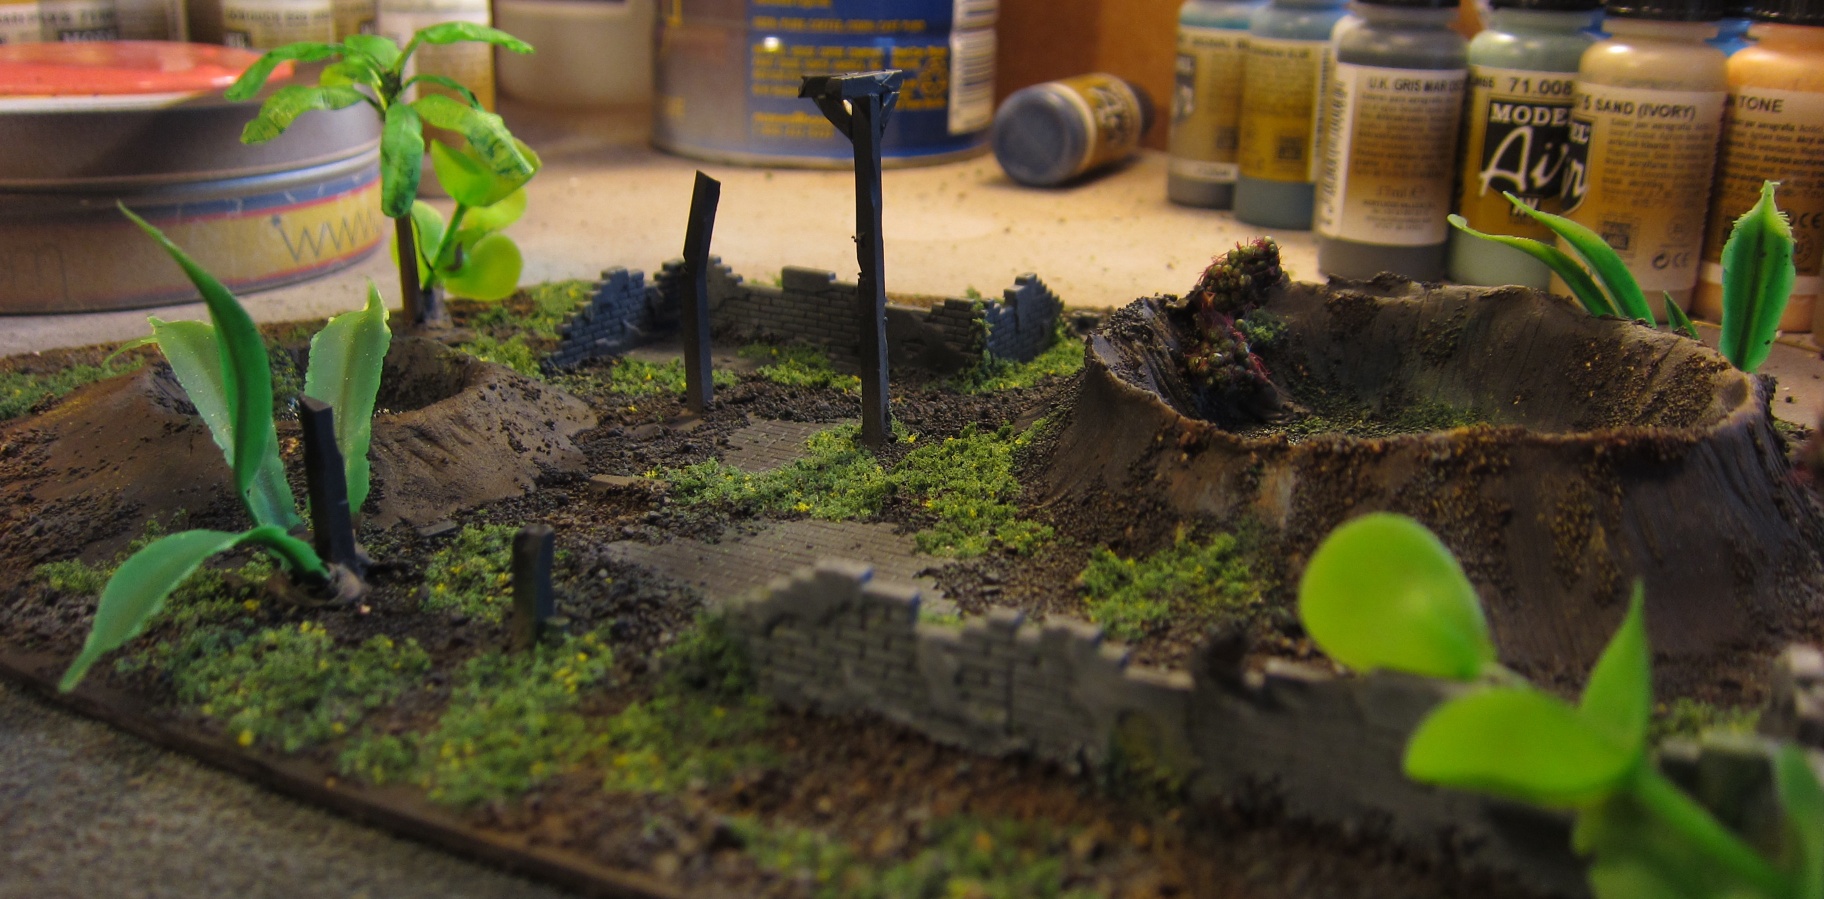
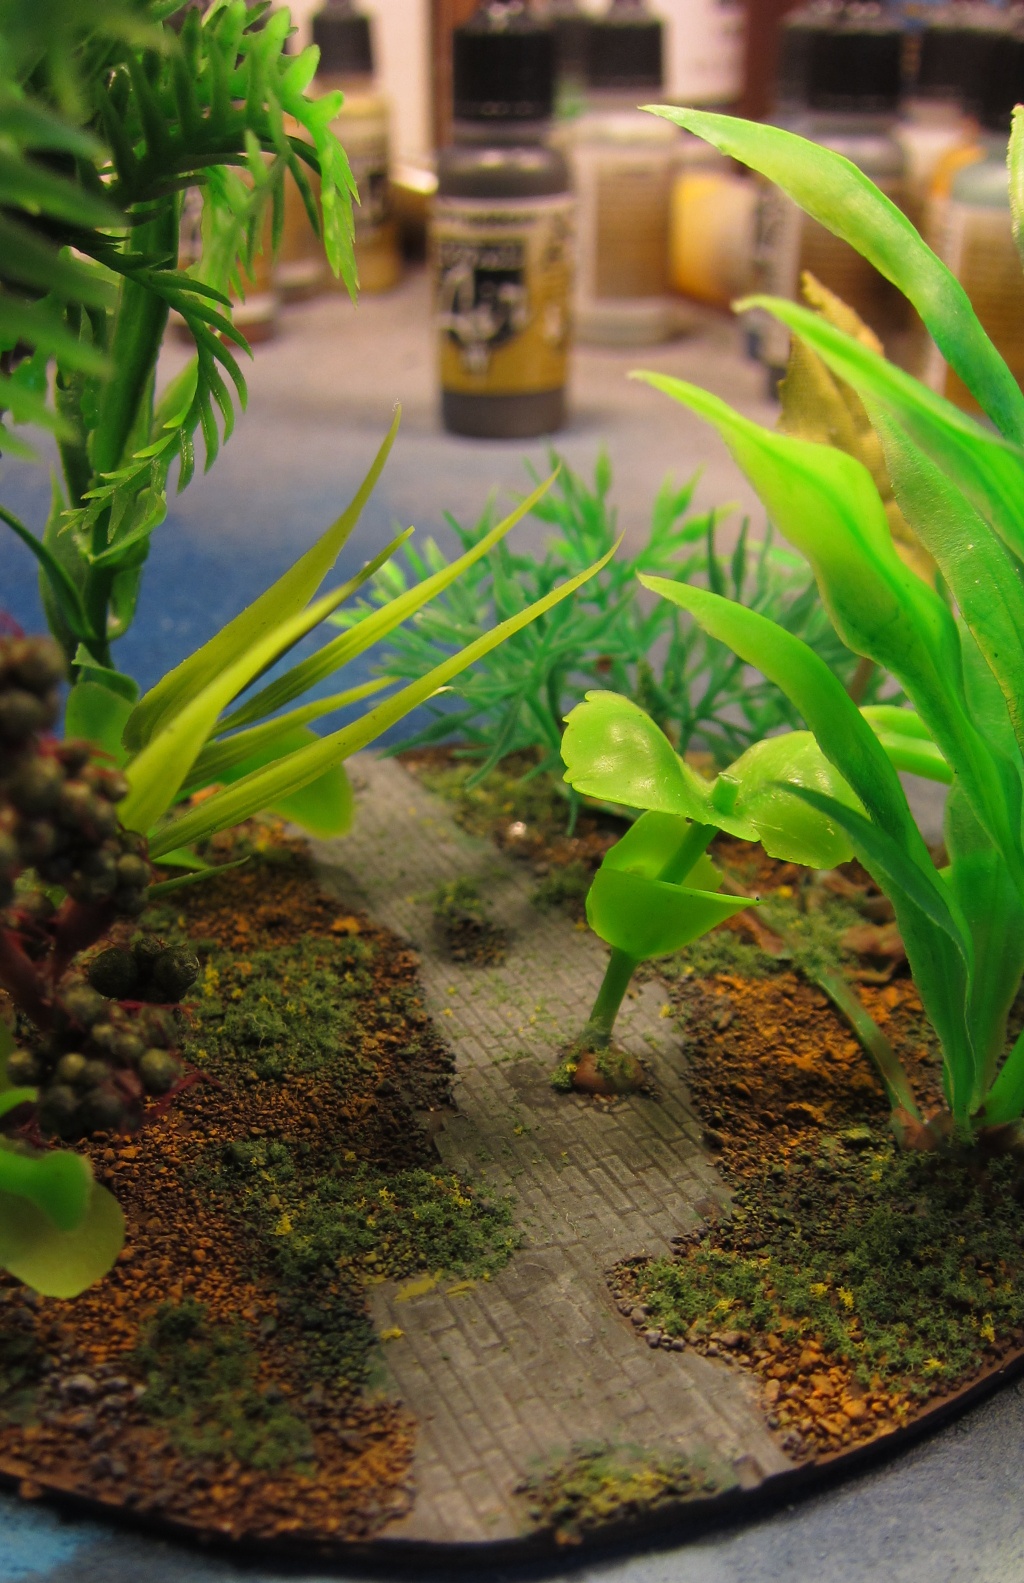
I used plastruct card for the base, then sculpted some elements from Polyform Model Air clay amd used some ruined building bits from a WWII scenery box. When those were arranged and glued in place, I put down a mix of three sizes of sand to texture everything and then undercoated with primer. After the primer was two base layers of brown and some drybrushing of a ground highlight (sort of a golden yellow). Then for the burned out building, I used black to char the ground and ruins, finishing off both pieces with some drybrushed green - growth over top of the old damage. I then glued on the flock to the base, but I think I should have done this after the next step - attaching the plants.
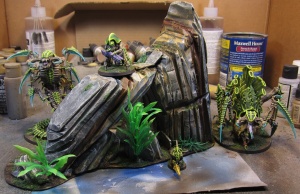
The plants are mostly cheap plastic aquarium plants cut into smaller pieces, but I used some fake plants from the craft store floral department and even some banana tree models that came out of a box. To get them fixed down, I put little blobs of green stuff (epoxy putty) on the base of each and tried to secure it to the base by mashing it in there. When it was dry, I went back with superglue to glue the plant in the epoxy and glue the epoxy to the board - the green stuff does stick pretty well on it's own, but I wanted to be sure. When that was done, I coated everything with a matte undercoat and then a few drops of gloss coat where I wanted it to look like there was a puddle.
Just for a height and color comparison, here are both pieces with some of the painted tyranids who are supposed to match.
September 11, 2014
-
Not Your Average Nixie Clock
-
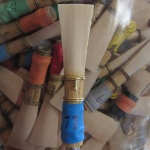
How I Make my Reeds
-

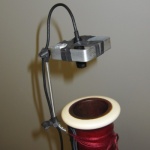
Acoustic Isolation Chamber
-
Acoustic Bassoon Pickup
